Makeup

Benefits of Using Illuminating Setting Sprays

5 Benefits of Using Illuminating Setting Sprays

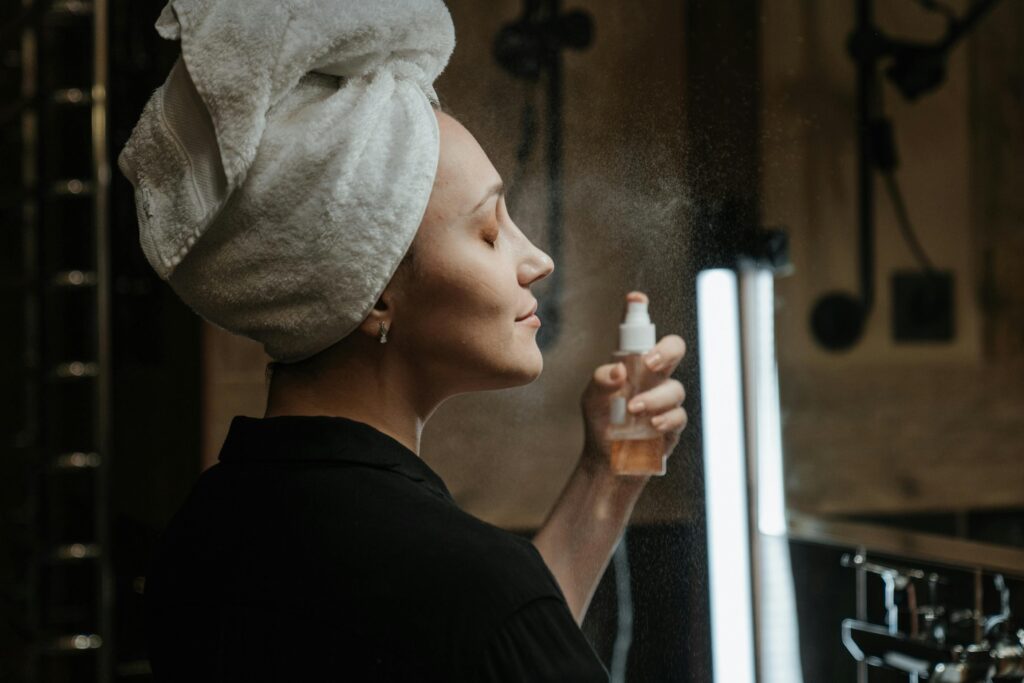
Illuminating setting sprays are a game-changer in the world of makeup. These sprays not only lock your look in place but also add a radiant finish to your skin. Perfect for all skin types, they ensure your makeup lasts longer while giving your complexion a natural, healthy glow. Let’s explore the many benefits of using illuminating setting sprays and how they can elevate your beauty routine. What is an Illuminating Setting Spray? An illuminating setting spray is a lightweight mist designed to set makeup while enhancing the skin’s natural radiance. Unlike traditional setting sprays, it contains light-reflecting particles that create a luminous finish. These sprays are versatile and can be used as a final step in makeup application or as a refreshing boost throughout the day. They’re often infused with skincare ingredients like hyaluronic acid, glycerin, or botanical extracts, providing hydration and nourishment alongside their glow-boosting properties. This makes them a popular choice for achieving dewy, radiant skin. Key Benefits of Using Illuminating Setting Sprays 1. Enhances Makeup Longevity Illuminating setting sprays help your makeup stay in place for hours. They form a protective barrier that minimizes smudging, creasing, and fading. This ensures your look remains flawless from morning to night. 2. Provides a Radiant Glow The light-reflecting particles in illuminating sprays give your skin a healthy, dewy finish. This adds dimension to your makeup, making it look more natural and vibrant. 3. Hydrates the Skin Many illuminating setting sprays are enriched with hydrating ingredients. They combat dryness, keeping your skin moisturized and plump throughout the day. This is especially beneficial in dry or cold weather. 4. Reduces a Powdery Finish Setting powders can sometimes leave the skin looking matte or cakey. An illuminating setting spray softens this effect, blending the makeup seamlessly for a more natural appearance. 5. Multi-Purpose Use These sprays can be used beyond setting makeup. They’re excellent for refreshing your skin during the day, prepping your face before makeup, or even enhancing the radiance of bare skin. Improves Skin Texture Some formulas include ingredients that smooth and refine the skin’s texture. Over time, this can result in a softer and more even complexion, both with and without makeup. How to Use an Illuminating Setting Spray Choosing the Right Illuminating Setting Spray When selecting an illuminating setting spray, consider your skin type and desired finish: Is Illuminating Setting Spray Suitable for All Skin Types? Illuminating setting sprays are versatile and can be used on most skin types. However, if you have very oily skin, choose a product designed to provide a subtle glow without emphasizing shine. Always do a patch test before using a new product to ensure it’s suitable for your skin. Conclusion Illuminating setting sprays are a must-have for anyone looking to achieve a radiant, long-lasting makeup finish. They provide hydration, enhance glow, and keep your makeup in place effortlessly. Whether you’re heading to an event or just want a fresh, dewy look, these sprays are a fantastic addition to your routine. Frequently Asked Questions (FAQs) 1. Can I use an illuminating setting spray on bare skin? Yes, illuminating setting sprays can enhance the natural glow of bare skin. They’re also great for hydrating and refreshing your complexion throughout the day. 2. How often can I use an illuminating setting spray? You can use it as often as needed. Apply it after makeup to set your look or mist it during the day to refresh your skin and add radiance. 3. Will an illuminating setting spray make my skin look oily? No, a good illuminating spray provides a radiant glow without making your skin appear greasy. If you have oily skin, choose a lightweight formula designed for your skin type. 4. Can I layer illuminating setting spray with other makeup products? Absolutely. Use it as the final step in your routine or mist it between makeup layers for added hydration and glow. 5. Is an illuminating setting spray suitable for sensitive skin? Yes, but always check the ingredient list. Look for fragrance-free options with soothing ingredients to minimize the risk of irritation.

5 Benefits of Using Illuminating Setting Sprays Read More »
Makeup Trends Inspired by Art Nouveau

Art Nouveau, a decorative art movement from the late 19th and early 20th centuries, continues to inspire modern aesthetics. Known for its flowing lines, intricate floral motifs, and nature-inspired designs, this style translates beautifully into makeup trends. From bold eyeliner designs to soft, natural tones, Art Nouveau offers endless possibilities for creating unique and artistic looks. What is Art Nouveau? Art Nouveau is a design movement characterized by organic shapes, asymmetry, and inspiration from nature. Common motifs include flowers, leaves, and flowing, curvilinear lines. This movement influenced various forms of art, including architecture, fashion, and jewelry, and now serves as a muse for creative makeup artistry. Makeup Trends Influenced by Art Nouveau Art Nouveau makeup trends bring together creativity and elegance. Here are the key features that define this style: Soft and Natural Tones Art Nouveau values harmony and subtlety, making soft, earthy tones a prominent feature. Shades like muted greens, pastel pinks, and warm browns create a natural yet sophisticated look. These colors emphasize a connection to nature, reflecting the movement’s botanical inspiration. Blushes and eyeshadows in these hues can be blended seamlessly for a delicate, romantic effect. Bold, Curvilinear Eyeliner One of the standout trends is the use of bold eyeliner designs inspired by Art Nouveau’s signature flowing lines. This involves creating curvilinear shapes around the eyes, resembling vines or petals. Black or dark brown liners are most commonly used, but metallic shades like gold and bronze can add a luxurious touch. This trend allows for personalization, with designs ranging from subtle curves to intricate patterns. Floral Motifs and Patterns Art Nouveau’s love for nature is often reflected through floral motifs in makeup. These patterns can be hand-drawn onto the face using fine-tip brushes or stencils. Common placements include the corners of the eyes, cheeks, and forehead. Using soft pastels or metallic shades helps achieve a delicate and artistic finish. Radiant Skin with a Dewy Finish The Art Nouveau aesthetic emphasizes natural beauty, making radiant, dewy skin a must. Hydrating primers and luminous foundations can create the perfect base for this look. Highlighter applied to the high points of the face—such as the cheekbones, nose, and brow bones—enhances this glow, adding dimension and depth to the overall appearance. Gradient Lip Colors Inspired by Art Nouveau’s gradient shading techniques, lips are often styled with soft ombré effects. This involves blending two complementary shades to create a seamless transition of color. For example, a rich berry shade can fade into a lighter pink, offering a unique and artistic touch. Matte and satin finishes work best for this trend, ensuring the focus remains on the subtle gradient. How to Create an Art Nouveau-Inspired Makeup Look Creating an Art Nouveau-inspired makeup look involves combining creativity with precision. Here’s a step-by-step guide: Why Art Nouveau is a Timeless Inspiration Art Nouveau’s emphasis on natural beauty and artistic expression makes it a timeless source of inspiration. Its intricate designs and harmonious color palettes appeal to modern sensibilities while offering a touch of nostalgia. The versatility of Art Nouveau-inspired makeup allows individuals to adapt the trends to their unique style. Whether you prefer subtle nods to the movement or bold, artistic interpretations, there’s something for everyone in this timeless aesthetic. Conclusion Art Nouveau-inspired makeup trends celebrate the fusion of art and beauty. From soft, natural tones to intricate eyeliner designs, this style offers endless possibilities for creative expression. Embrace these trends to add a touch of elegance and artistry to your makeup routine. Frequently Asked Questions (FAQs) 1. Can beginners try Art Nouveau-inspired makeup? Yes, beginners can start with simple elements like soft tones and dewy skin. As you gain confidence, you can experiment with bolder designs, such as curvilinear eyeliner or floral patterns. 2. What tools are essential for creating Art Nouveau-inspired makeup? Fine-tip brushes, a high-quality eyeliner, and soft, blendable eyeshadows are essential. Stencils can also help with intricate designs. 3. Are Art Nouveau makeup trends suitable for everyday wear? Many elements, like natural tones and dewy skin, are perfect for everyday looks. For special occasions, you can incorporate bolder features like floral motifs and gradient lips. 4. How can I ensure my makeup lasts longer? Use a hydrating primer and a long-wear setting spray. Layering products, such as setting powder over foundation, can also improve longevity. 5. Can I combine Art Nouveau trends with other styles? Absolutely! Art Nouveau makeup trends can be blended with modern or vintage styles to create a personalized and unique look.

Makeup Trends Inspired by Art Nouveau Read More »

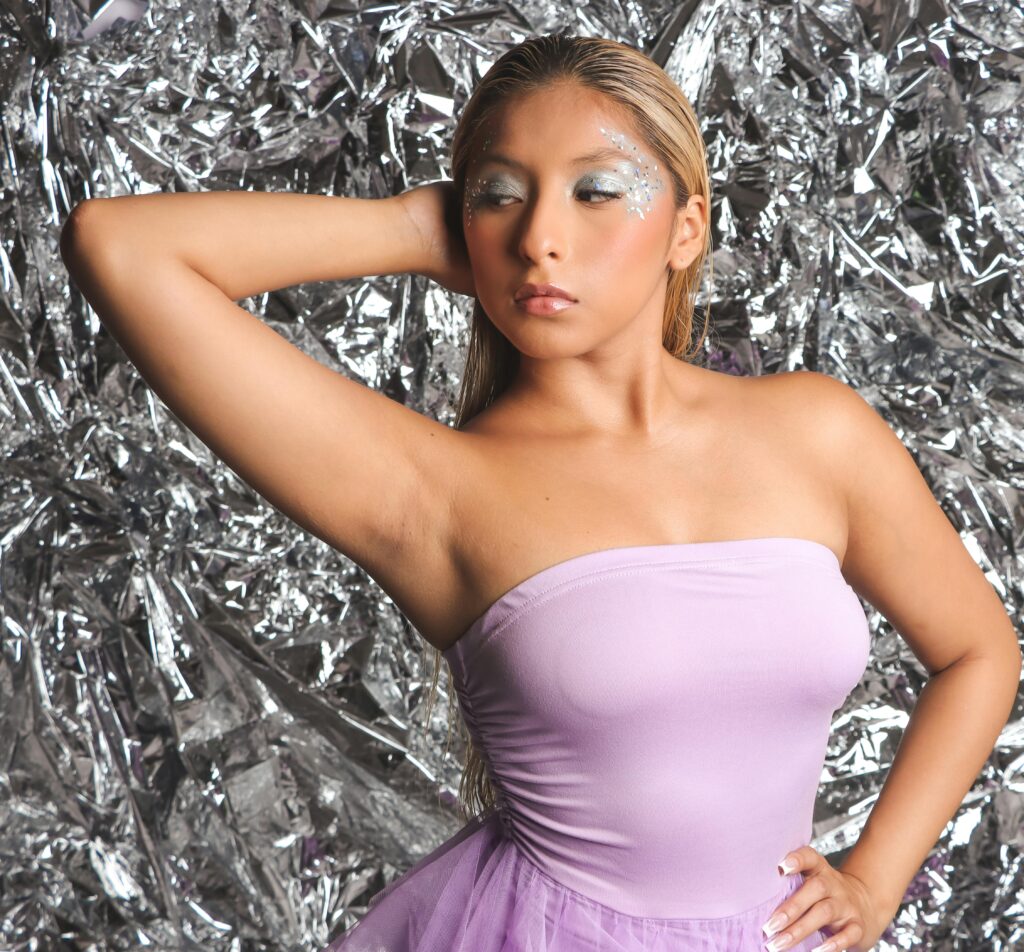
How to Create Foiled Eyeshadow Looks with Metallic Pigments

How to Create Foiled Eyeshadow Looks with Metallic Pigments

Foiled eyeshadow looks are a captivating way to add drama and shimmer to your makeup. Featuring intense metallic pigments, these looks are perfect for special occasions or when you want your eyes to be the center of attention. Creating a foiled effect is surprisingly simple with the right tools and techniques. Here’s a detailed guide to help you achieve a flawless foiled eyeshadow look that will turn heads. What is a Foiled Eyeshadow Look? A foiled eyeshadow look is a makeup technique that uses metallic pigments or eyeshadows to create a highly reflective, wet-like finish on the eyelids. The shimmer appears smooth and intense, giving your eyes a standout, high-glam effect. Foiled eyeshadow can be subtle or bold, depending on the colors and application style. The “foiling” process involves combining metallic pigments with a mixing medium or a damp brush to intensify the pigment’s shine and adhesion. This technique ensures the shadow adheres evenly, preventing fallout and enhancing longevity. Tools and Products You Need To achieve a foiled eyeshadow look, gather the following essentials: Step-by-Step Guide to Creating a Foiled Eyeshadow Look Achieving the perfect foiled look requires careful preparation and execution. Follow these steps for a stunning finish: Step 1: Prep Your Eyelids Start by applying a thin layer of eyeshadow primer to your eyelids. This creates a smooth base, enhances pigment adhesion, and prevents creasing. If you don’t have primer, a concealer set with a light dusting of translucent powder works as an alternative. Step 2: Choose Your Metallic Shade Pick a metallic pigment or eyeshadow shade that complements your overall makeup look. Popular options include gold, bronze, silver, and jewel tones like emerald or sapphire. Step 3: Dampen Your Brush Spray your flat eyeshadow brush with a setting spray or dip it lightly into a mixing medium. This step is crucial for intensifying the pigment and achieving the signature foiled effect. Avoid oversaturating the brush, as too much liquid can dilute the pigment or make the texture uneven. Step 4: Pack on the Pigment Dip the dampened brush into the metallic pigment. Press the shadow onto your eyelid with gentle tapping motions, starting at the center and blending outward. Avoid sweeping motions to prevent fallout. For a more intense shine, layer the pigment until you achieve the desired opacity. Step 5: Blend the Edges Use a clean blending brush to soften the edges of the metallic shadow. This creates a seamless transition between the foiled area and any surrounding matte or shimmer shades. Step 6: Add Depth (Optional) For added dimension, apply a matte shade to the crease or outer corner of your eyes. This step enhances the overall look and adds contrast to the metallic finish. Step 7: Finish with Mascara and Eyeliner Complete your foiled eyeshadow look with mascara and, if desired, eyeliner. A winged liner pairs beautifully with bold foiled lids. Tips for Perfecting Your Foiled Eyeshadow Look Common Mistakes to Avoid Conclusion Creating a foiled eyeshadow look with metallic pigments is an art that’s easy to master with the right tools and techniques. The result is a dazzling, high-impact finish that elevates any makeup look. Whether you’re preparing for a night out or simply experimenting with new styles, foiled eyeshadow offers endless possibilities for creativity. Frequently Asked Questions (FAQs) 1. Can I create a foiled eyeshadow look without metallic pigments? Yes, you can use metallic eyeshadows or shimmery shades from your palette. Dampen your brush to intensify their shine and achieve a similar effect. 2. Do I need a specific mixing medium for foiling? A mixing medium is ideal, but setting spray or even water can work in a pinch. Ensure the liquid is skin-safe and doesn’t irritate your eyes. 3. How do I prevent fallout when working with metallic pigments? Tap off excess pigment from your brush before application and press the pigment onto your lid instead of sweeping it. 4. Can I wear a foiled eyeshadow look during the day? Absolutely! Opt for softer metallic shades like champagne or rose gold for a subtle daytime look. 5. How do I remove foiled eyeshadow? Use an oil-based makeup remover or micellar water to break down the metallic pigments gently. Follow up with your regular cleanser to ensure all residue is removed.

How to Create Foiled Eyeshadow Looks with Metallic Pigments Read More »

Benefits of Using Matte Setting Powders for Oil Control

Benefits of Using Matte Setting Powders for Oil Control

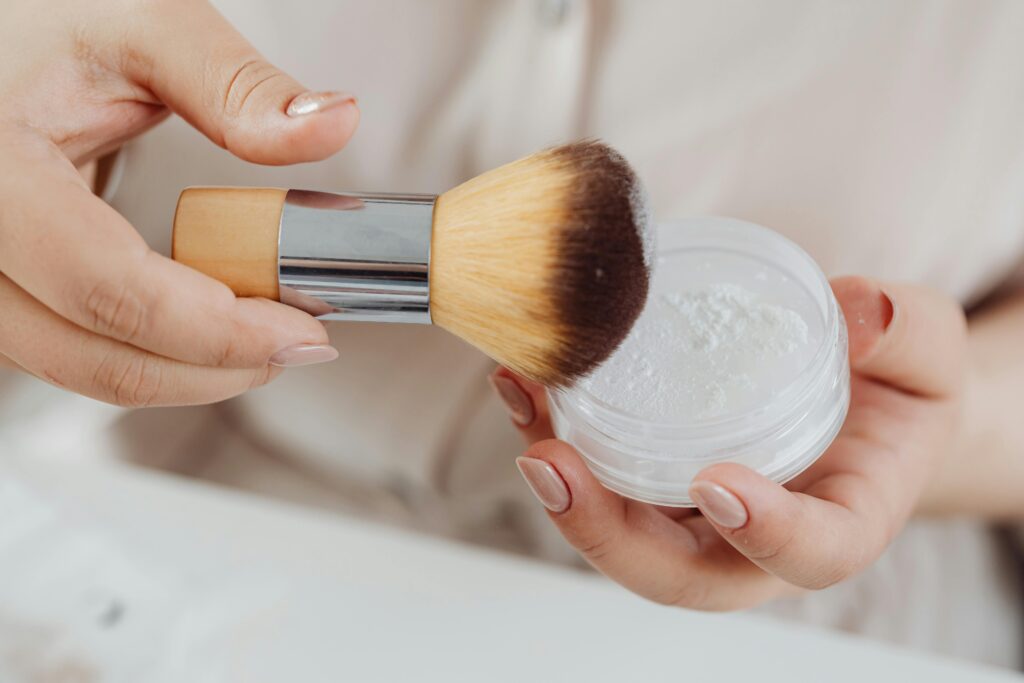
Matte setting powders are a staple for anyone looking to maintain a shine-free complexion throughout the day. Designed to control excess oil and set makeup, these powders are especially beneficial for those with oily or combination skin. Let’s dive into the key benefits of matte setting powders and how they can elevate your makeup routine. What Are Matte Setting Powders? Matte setting powders are lightweight, finely milled powders used to set foundation and concealer while minimizing shine. Unlike illuminating powders, matte powders focus on oil control and a smooth finish. They come in both translucent and tinted varieties, making them suitable for a range of skin tones. These powders are typically applied with a brush, puff, or sponge, and are ideal for touch-ups throughout the day to maintain a matte look. How Matte Setting Powders Help with Oil Control Excess oil production can cause makeup to break down, leading to a shiny and uneven appearance. Matte setting powders address this issue by absorbing oil and reducing shine, ensuring your makeup stays intact for hours. 1. Absorbs Excess Oil Matte setting powders contain oil-absorbing ingredients like silica or kaolin clay. These components soak up sebum, leaving your skin with a matte finish. This makes them particularly effective for controlling shine in oily areas like the T-zone. 2. Sets Makeup in Place Applying matte powder over your foundation and concealer locks everything in place. This prevents makeup from smudging, creasing, or transferring, even in humid conditions. 3. Reduces the Appearance of Pores The finely milled texture of matte setting powders blurs the appearance of pores and imperfections. This gives your skin a smooth, airbrushed effect. Benefits of Using Matte Setting Powders In addition to oil control, matte setting powders offer several other advantages that enhance your makeup look and skin health. Long-Lasting Makeup One of the main benefits of matte powders is their ability to extend the longevity of your makeup. They create a barrier that prevents oil from breaking through, ensuring your foundation and concealer stay put. Versatility for All Skin Types While ideal for oily skin, matte powders can also work for combination or normal skin. Using them sparingly in areas prone to shine ensures a balanced, natural look. Lightweight Feel Unlike heavy powders that can feel cakey, matte setting powders are ultra-lightweight. They sit comfortably on the skin, making them perfect for all-day wear. Prevents Makeup Oxidation Excess oil can cause foundation to oxidize, resulting in an unwanted color change. Matte powders control oil levels, helping your makeup retain its original shade. Easy Touch-Ups Matte powders are convenient for quick touch-ups. A light dusting on oily areas refreshes your makeup without disturbing the underlying layers. How to Use Matte Setting Powders Effectively To get the most out of your matte setting powder, follow these steps: Choosing the Right Matte Setting Powder Not all matte powders are created equal. Consider these factors when selecting one: Conclusion Matte setting powders are a game-changer for controlling excess oil and achieving a flawless makeup look. With their ability to absorb oil, set makeup, and blur imperfections, they’re an essential tool for anyone seeking a shine-free, long-lasting finish. Incorporate a quality matte setting powder into your routine to keep your skin looking fresh and balanced all day long. Frequently Asked Questions (FAQs) 1. Can matte setting powders be used on dry skin? Yes, but use them sparingly. Focus on oily areas or lightly dust over your makeup to avoid emphasizing dryness. 2. How often should I reapply matte setting powder? Reapply as needed, especially when your skin starts to look shiny. Always blot excess oil first to prevent buildup. 3. Do matte powders cause flashback in photos? Some translucent powders can cause flashback due to their high silica content. Opt for powders labeled as “photo-friendly” to avoid this. 4. Can matte setting powders replace blotting papers? While they’re excellent for controlling oil, blotting papers are better for removing excess oil without adding extra product. Use both for best results. 5. Are matte setting powders suitable for sensitive skin? Yes, but choose a formula free from fragrances and harsh chemicals. Always do a patch test to ensure compatibility with your skin.

Benefits of Using Matte Setting Powders for Oil Control Read More »

Makeup Trends Inspired by Vintage Hollywood

Makeup Trends Inspired by Vintage Hollywood

Vintage Hollywood is synonymous with timeless elegance and unmatched glamour. From the striking red lips of Marilyn Monroe to Audrey Hepburn’s precise cat-eye liner, the classic looks of yesteryear continue to influence modern beauty trends. Let’s delve into iconic makeup styles from Hollywood’s golden age and how they’re making a bold comeback in today’s makeup scene. Iconic Makeup Trends from Vintage Hollywood The makeup styles of vintage Hollywood were all about creating a flawless, dramatic, and alluring look. These trends remain iconic, serving as the foundation for countless modern interpretations. The Classic Red Lip The bold red lip is perhaps the most defining feature of vintage Hollywood beauty. Stars like Marilyn Monroe and Rita Hayworth popularized this look, pairing it with minimal eye makeup to let the lips take center stage. To achieve the perfect red lip, start with a lip liner to define the shape and prevent smudging. Choose a matte or satin-finish red lipstick for a truly vintage vibe. Today, red lips remain a go-to for exuding confidence and glamour. Winged Eyeliner Winged eyeliner, also known as the “cat-eye,” was a favorite of stars like Audrey Hepburn. This look adds sophistication and elongates the eyes, creating a sultry effect. Use a liquid or gel eyeliner to draw a thin line along the lash line, extending it slightly upward at the outer corners. The key is precision and practice to perfect this timeless look. Dewy, Luminous Skin Vintage Hollywood stars often sported dewy, radiant skin to reflect their healthy and youthful appearance. Makeup artists achieved this using cream-based foundations and highlighters. Modern interpretations of this trend focus on achieving a natural glow with hydrating primers, lightweight foundations, and strategically placed highlighters. This look complements bold features like red lips or dramatic eyes. Perfectly Arched Brows Full, well-defined brows were a hallmark of vintage Hollywood beauty. Stars like Elizabeth Taylor showcased bold brows that framed their faces perfectly. To recreate this look, use a brow pencil or powder to fill in sparse areas. Aim for a natural yet defined shape to enhance your facial features without overpowering them. Soft Smokey Eyes While dramatic smokey eyes are common today, vintage Hollywood favored a softer version. Think subtle shading with neutral tones to create depth and dimension. Use a blend of taupe, brown, and champagne eyeshadows to achieve this understated elegance. Pair it with a thin eyeliner and mascara for a polished finish. Adapting Vintage Hollywood Makeup for Modern Looks While vintage Hollywood makeup is stunning, adapting these trends for everyday wear can make them more practical. Mixing Old with New Blend vintage elements with modern techniques. For example, pair a bold red lip with fresh, dewy skin and minimal eye makeup for a balanced look. Neutral Shades for Daytime Tone down classic trends like red lips or smokey eyes with neutral shades for a more wearable daytime look. Opt for peachy tones or soft pinks for a subtle nod to vintage glamour. Experimenting with Textures Modern makeup offers a variety of textures, from matte to glossy. Experiment with these to give vintage-inspired looks a contemporary twist. A glossy red lip or a shimmering smokey eye can add a fresh, modern feel. Tools and Products for Vintage Hollywood Makeup To recreate these iconic looks, having the right tools and products is essential. Why Vintage Hollywood Makeup Remains Timeless Vintage Hollywood makeup continues to inspire because of its versatility and universal appeal. These looks suit a wide range of skin tones, face shapes, and personal styles. Moreover, the focus on enhancing natural beauty while adding a touch of glamour makes these trends both aspirational and achievable. They’re perfect for special occasions, photoshoots, or simply when you want to feel a bit more glamorous. Conclusion Vintage Hollywood makeup trends have stood the test of time, offering timeless elegance and unparalleled glamour. From bold red lips to sultry winged eyeliner, these iconic styles continue to inspire and elevate modern beauty routines. By blending classic elements with contemporary techniques, you can create looks that are both vintage-inspired and uniquely your own. Frequently Asked Questions (FAQs) 1. What is the best way to achieve a classic red lip? Start by lining your lips with a matching red lip liner to define the shape. Fill in with a creamy or matte red lipstick for a flawless finish. 2. How can I perfect a winged eyeliner look? Use a liquid or gel eyeliner for precision. Begin with a thin line along the lash line and extend it slightly upward at the outer corners. Practice makes perfect. 3. Can vintage Hollywood makeup be worn daily? Yes, you can adapt vintage trends for daily wear by toning down bold features. Opt for neutral shades and lighter textures for a more subtle look. 4. What products are essential for recreating vintage Hollywood makeup? Key products include red lipstick, liquid eyeliner, cream highlighter, neutral eyeshadows, and brow pencils. Quality brushes are also important for seamless application. 5. Are vintage Hollywood makeup trends suitable for all skin tones? Absolutely! The universal appeal of these trends ensures they suit a variety of skin tones. Adjust the shades and techniques to complement your natural features.

Makeup Trends Inspired by Vintage Hollywood Read More »

DIY Makeup Brush Cleansing Shampoos for Deep Cleaning

DIY Makeup Brush Cleansing Shampoos for Deep Cleaning

Dirty makeup brushes can lead to skin irritation, clogged pores, and uneven makeup application. Regular cleaning is essential to keep your brushes in top condition, but you don’t always need store-bought cleaners. With a few simple ingredients, you can make effective DIY makeup brush cleansing shampoos that deep clean your brushes while being gentle on the bristles. Let’s explore some easy-to-follow recipes and tips to keep your brushes spotless and your skin healthy. Why Cleaning Your Makeup Brushes is Essential Makeup brushes accumulate makeup residue, oils, and bacteria over time. If not cleaned regularly, these can transfer to your skin, causing breakouts and other skin issues. Deep cleaning not only maintains brush hygiene but also extends the life of your brushes, ensuring better performance for flawless makeup application. Ingredients to Look for in DIY Brush Cleansers The key to an effective DIY cleansing shampoo lies in its ingredients. Here are some common and effective options: Gentle Soaps or Shampoos Choose sulfate-free soaps or baby shampoos to clean bristles without damaging them. These are mild yet effective at breaking down oils and makeup residue. Olive Oil or Coconut Oil These natural oils help condition brush bristles while breaking down stubborn, oil-based makeup products. White Vinegar White vinegar has natural antibacterial properties that help disinfect your brushes during the cleaning process. Baking Soda Baking soda acts as a gentle exfoliant, ideal for brushes with thicker buildup. Essential Oils (Optional) Adding a drop of lavender or tea tree oil not only leaves your brushes smelling fresh but also provides additional antibacterial benefits. DIY Makeup Brush Cleansing Shampoo Recipes Here are three simple recipes to make at home: 1. Basic Deep-Cleaning Shampoo This recipe works for everyday cleaning and is suitable for all types of brushes. Ingredients: Steps: 2. Vinegar and Baking Soda Cleanser Ideal for brushes that haven’t been cleaned in a while, this recipe provides a thorough deep clean. Ingredients: Steps: 3. Conditioning Cleanser for Soft Bristles This recipe is perfect for preserving the softness of natural hair brushes. Ingredients: Steps: Tips for Effective Brush Cleaning Conclusion Cleaning your makeup brushes doesn’t have to be expensive or complicated. With these DIY cleansing shampoo recipes, you can keep your brushes clean, soft, and ready for flawless makeup application. Regular maintenance ensures healthier skin and prolongs the life of your brushes. Frequently Asked Questions (FAQs) 1. How often should I clean my makeup brushes? Clean brushes used for liquid or cream products weekly, while brushes used for powders can be cleaned every 2-3 weeks. 2. Can I use dish soap to clean my brushes? Yes, but choose a mild, unscented dish soap to avoid drying out the bristles. 3. How long does it take for brushes to dry? Brushes typically take 6-12 hours to dry completely. It’s best to clean them in the evening so they’re ready by morning. 4. Are DIY cleansers safe for all types of brushes? Most DIY cleansers are safe, but always test on a small area of the brush first, especially for natural hair brushes. 5. What’s the best way to disinfect brushes? Adding a small amount of white vinegar to your cleanser helps disinfect brushes naturally.

DIY Makeup Brush Cleansing Shampoos for Deep Cleaning Read More »

Benefits of Using Dewy Setting Powders for Luminous Skin

Benefits of Using Dewy Setting Powders for Luminous Skin

Dewy setting powders have become a staple in makeup routines, especially those aiming for a luminous, radiant complexion. Unlike traditional matte powders, these formulas help set your makeup without dulling your skin’s natural glow. Hydration and light-reflecting properties make them perfect for achieving that fresh, lit-from-within look. Let’s dive into how dewy setting powders can transform your makeup game and improve your skin’s appearance. What Are Dewy Setting Powders? Dewy setting powders are lightweight powders designed to set makeup while enhancing your skin’s natural radiance. These powders often contain ingredients like hyaluronic acid, pearl particles, and nourishing oils, which hydrate the skin and provide a subtle glow. Unlike matte powders that absorb oil and leave a flat finish, dewy setting powders add a touch of luminosity, making them ideal for dry or dull skin. They are versatile enough for an all-over glow or to highlight specific areas of your face. Benefits of Using Dewy Setting Powders Dewy setting powders do more than just set makeup. They offer a variety of benefits that can elevate your overall makeup look while caring for your skin. 1. Provides a Natural Glow The light-reflecting properties in dewy setting powders give your skin a radiant finish. They help create a soft, luminous effect without looking overly shiny or greasy. 2. Hydrates the Skin Many dewy setting powders are infused with hydrating ingredients like hyaluronic acid. This helps prevent your skin from feeling dry or tight throughout the day, making it a great option for those with dry or combination skin. 3. Sets Makeup Without Caking These powders are finely milled, ensuring they set your makeup seamlessly without settling into fine lines or creating a cakey appearance. The lightweight texture ensures a flawless finish. 4. Enhances Skin Texture Dewy setting powders blur imperfections and smooth the appearance of your skin. They soften the look of pores and fine lines, creating a polished, airbrushed effect. 5. Versatile for All Skin Types While especially beneficial for dry or mature skin, dewy setting powders can also work for oily skin when used strategically. Apply to highlight areas like the cheekbones for a controlled glow. 6. Long-Lasting Makeup These powders lock your makeup in place while adding a radiant touch. They ensure your makeup stays fresh throughout the day without compromising your skin’s natural beauty. How to Use Dewy Setting Powders Using dewy setting powders correctly can make all the difference. Here are some tips to help you get the most out of your product: Ingredients to Look For in Dewy Setting Powders Not all dewy setting powders are created equal. Here are some ingredients to look for when choosing the best option for your skin: Common Mistakes to Avoid While dewy setting powders are user-friendly, certain mistakes can affect their effectiveness: Conclusion Dewy setting powders are the perfect addition to any makeup routine for achieving luminous, healthy-looking skin. They not only set your makeup but also hydrate and enhance your natural glow. Their lightweight texture and skin-friendly ingredients make them a must-have for anyone looking to elevate their makeup game. Try incorporating a dewy setting powder into your routine for a radiant, flawless finish. Frequently Asked Questions (FAQs) 1. Can dewy setting powders work for oily skin? Yes, they can. Focus on applying the powder to highlight specific areas like the cheekbones rather than the entire face to avoid excessive shine. 2. How is a dewy setting powder different from a matte powder? Dewy setting powders provide a radiant finish with added hydration, while matte powders absorb oil and leave a flat, shine-free finish. 3. Can I use dewy setting powder without foundation? Absolutely. Dewy setting powders can be used on bare skin to enhance its natural glow and blur minor imperfections. 4. Are dewy setting powders suitable for mature skin? Yes, they are ideal for mature skin. Their hydrating and light-reflecting properties minimize the appearance of fine lines and add a youthful glow. 5. How do I avoid looking shiny with a dewy setting powder? Use a light hand and apply the powder strategically to specific areas. Avoid overapplying to the T-zone if you’re prone to oiliness.

Benefits of Using Dewy Setting Powders for Luminous Skin Read More »

Makeup Trends Inspired by Art Deco

Makeup Trends Inspired by Art Deco

Art Deco, the iconic design movement of the 1920s and 1930s, continues influencing beauty trends with its bold shapes, rich colors, and opulent details. Known for its focus on symmetry, metallic finishes, and geometric precision, Art Deco makeup reflects a glamorous, confident aesthetic. Let’s dive into how this artistic era inspires modern makeup trends and techniques. What is Art Deco Style? Art Deco emerged in the early 20th century, blending modernism with luxury. Characterized by clean lines, symmetry, and bold patterns, this style was popular in everything from architecture to fashion. In makeup, Art Deco’s influence shines through in striking color palettes, precise details, and a focus on dramatic glamour. Iconic Art Deco Makeup Elements Bold, Defined Lips Art Deco makeup often emphasizes a statement lip. Deep reds, rich burgundies, and bold plums were popular during the 1920s, creating a striking focal point for the face. Modern makeup trends bring these shades back with matte and satin finishes, allowing for a fresh take on a classic look. Pairing bold lips with minimal eye makeup can create a balanced, vintage-inspired aesthetic. Geometric Eye Designs Sharp lines and geometric shapes are hallmarks of Art Deco design. In makeup, this translates to graphic eyeliner styles, such as winged liners with precise edges or double-liner effects. Eyeshadow trends inspired by this era often include metallic shades like gold, silver, and bronze, applied in clean, angular patterns. These designs add a touch of drama and elegance to any look. Flawless Matte Skin Art Deco-inspired beauty embraces a matte complexion as a canvas for bold colors. Achieving this look requires lightweight, buildable foundations and translucent powders to minimize shine while maintaining a natural glow. Modern techniques often combine matte finishes with subtle highlighters on the cheekbones and brow bones to add dimension without overshadowing the geometric details. Metallic Accents Metallic finishes were central to the opulence of Art Deco. This trend translates beautifully into makeup with shimmering eyeshadows, metallic highlighters, and glittering accents. Adding a pop of metallic to the eyelids or inner corners of the eyes can elevate any look, channeling the luxurious spirit of the 1920s. Thin, Arched Brows The 1920s and 1930s were known for their thin, sharply arched eyebrows, which framed the face with precision. While modern trends favor fuller brows, Art Deco-inspired looks can incorporate well-defined shapes using brow pencils and gels. Opt for clean, structured brows with a slight arch to maintain a nod to the era without appearing overly dated. Incorporating Art Deco into Modern Makeup 1. Statement Lips and Bare Eyes To embrace the Art Deco aesthetic, combine bold lips with minimal eye makeup. Opt for deep red or burgundy shades paired with subtle eyeliner and mascara to keep the look elegant. 2. Metallic Smoky Eyes For a dramatic evening look, create a smoky eye using metallic shadows in gold, silver, or bronze. Blend the edges seamlessly to maintain the polished precision of Art Deco designs. 3. Graphic Liner Experiment with graphic eyeliner styles, such as sharp wings or geometric shapes. Use liquid or gel liners for crisp lines that mimic the symmetry of Art Deco patterns. 4. Monochromatic Looks Choose a single color family for your lips, cheeks, and eyes to create a cohesive, vintage-inspired look. Shades like peach, coral, or mauve work beautifully to channel subtle elegance. 5. Accessorize with Details Incorporate Art Deco elements into your makeup accessories. Use compacts, brushes, or lipsticks with geometric designs and metallic finishes to complete the aesthetic. Why Art Deco Makeup is Timeless Art Deco’s enduring appeal lies in its ability to combine boldness with sophistication. Its focus on clean lines and symmetrical designs resonates with modern minimalism, while its use of rich colors and metallics adds a touch of luxury. By blending these elements, Art Deco makeup offers a versatile approach to beauty that can be adapted for everyday wear or special occasions. Conclusion Art Deco-inspired makeup trends bring timeless elegance and bold creativity to modern beauty routines. From statement lips to geometric eye designs, this iconic style continues to inspire glamorous looks that stand the test of time. Embrace the allure of Art Deco and transform your makeup into a work of art. Frequently Asked Questions (FAQs) 1. What colors are commonly associated with Art Deco makeup? Art Deco makeup often features bold and luxurious colors like deep reds, burgundies, golds, silvers, and bronzes. These shades reflect the glamour and opulence of the era. 2. Can I incorporate Art Deco elements into everyday makeup? Yes! Subtle touches like a bold lip, metallic eyeshadow, or clean eyeliner can add an Art Deco vibe to your daily makeup without appearing overly dramatic. 3. How do I achieve the perfect matte skin for an Art Deco look? Start with a mattifying primer and lightweight foundation. Set your makeup with a translucent powder, and use a subtle highlighter for added dimension. 4. Are thin, arched brows necessary for Art Deco-inspired looks? Not necessarily. While thin brows were iconic in the 1920s, you can modernize the look by opting for well-defined, structured brows that suit your face shape. 5. What tools are best for creating geometric eyeliner designs? Use a fine-tipped liquid or gel liner for precision. Stencils can also help create clean, symmetrical shapes that mimic Art Deco patterns.

Makeup Trends Inspired by Art Deco Read More »

Art of Eye Sculpting: Defining and Enhancing Eye Shape with Makeup

Art of Eye Sculpting: Defining and Enhancing Eye Shape with Makeup

Makeup has the power to transform, highlight, and enhance our natural features, and no feature is more expressive than the eyes. Eye sculpting is a specialized technique that defines and enhances the shape of your eyes using makeup. Whether you want to create depth, lift, or widen your eyes, mastering this art can elevate your makeup game to the next level. In this guide, we’ll explore the best techniques for sculpting and defining eye shapes, ensuring you bring out their unique beauty with ease. Understanding Your Eye Shape The first step to mastering eye sculpting is understanding your eye shape. Each shape requires tailored techniques to achieve a balanced, enhanced look. Here are some common eye shapes and their characteristics: Identifying your eye shape helps you determine the most flattering techniques and products for sculpting. Techniques for Eye Sculpting 1. Using Light and Shadow for Definition The art of eye sculpting relies on the strategic placement of light and shadow to add depth and dimension. 2. Eyeliner Techniques for Eye Shapes Eyeliner plays a crucial role in defining and sculpting your eyes. Different styles suit different eye shapes: 3. Creating Depth with Eyeshadow Eyeshadow placement can dramatically change the perception of your eye shape. 4. Highlighting the Brow Bone and Inner Corners Highlighting adds a finishing touch that lifts and brightens the eyes. 5. Mascara and Lashes for Sculpting The right mascara and lashes can enhance eye shape significantly. Tools for Eye Sculpting Having the right tools ensures precision and ease: Common Mistakes to Avoid Conclusion Eye sculpting is a powerful technique that allows you to define and enhance your eyes with makeup. By understanding your unique eye shape and applying the right techniques, you can create stunning looks that highlight your natural beauty. With a little practice and the right tools, the art of eye sculpting can become a transformative part of your makeup routine. Frequently Asked Questions (FAQs) 1. Can I sculpt my eyes without using eyeliner? Yes, you can use eyeshadow to define and contour your eyes. A dark shade applied close to the lash line can mimic the effect of eyeliner. 2. How do I avoid making my eyes look smaller? Focus on brightening techniques, such as using light shades on the lid and inner corners. Avoid overloading the lower lash line with dark colors. 3. What’s the best way to sculpt hooded eyes? Use light shades on the lid and a darker shade slightly above the natural crease to create the illusion of depth. 4. How do I ensure my makeup lasts all day? Use an eyeshadow primer to prevent creasing and a setting spray to lock your look in place. 5. Are false lashes necessary for eye sculpting? No, but they can enhance the look. If you prefer a natural approach, focus on lengthening and volumizing mascara for a similar effect.

Art of Eye Sculpting: Defining and Enhancing Eye Shape with Makeup Read More »

How to Create Metallic Eye Makeup Looks with Foil Shadows

How to Create Metallic Eye Makeup Looks with Foil Shadows

Metallic eye makeup is a showstopper, instantly adding drama and dimension to any look. Foil shadows, known for their intense pigmentation and high-shine finish, are perfect for creating dazzling metallic effects. With the right techniques, you can achieve a professional-looking metallic eye that’s ideal for special events or even a bold everyday statement. Here’s how to master metallic eye makeup with foil shadows for a captivating finish. Why Choose Foil Shadows for Metallic Eye Makeup? Foil shadows are formulated to deliver a reflective, high-shine effect that’s hard to achieve with regular eyeshadows. Their unique texture, often creamy or pressed, makes them easy to blend and layer. These shadows are versatile, allowing you to create subtle shimmer or bold metallic looks. They’re also available in a range of shades, from classic golds and silvers to vibrant jewel tones, making them suitable for any occasion. Tools You’ll Need for Metallic Eye Makeup Achieving the perfect metallic eye requires the right tools. Here’s what you’ll need: Steps to Create Metallic Eye Makeup Looks with Foil Shadows 1. Prepare Your Eyes Start with a clean, moisturized eye area. Apply an eyeshadow primer across your lids to create a smooth base and enhance the longevity of the shadow. If you want a more vibrant look, use a concealer or eyeshadow base that matches your skin tone. 2. Choose Your Metallic Shade Select a foil shadow shade that complements your skin tone and outfit. Gold and bronze shades are great for warm undertones, while silver and cool-toned hues work well for cooler skin tones. Jewel tones like emerald or sapphire add a pop of color. 3. Apply a Transition Shade Using a fluffy blending brush, apply a neutral matte shade to your crease. This step helps blend the metallic shadow seamlessly and adds depth to your look. 4. Pack the Foil Shadow Onto the Lids Take a flat synthetic brush and dampen it slightly with setting spray. Dip the brush into your foil shadow and gently press the pigment onto your lids. Avoid sweeping motions, as pressing ensures maximum color payoff and minimizes fallout. 5. Blend the Edges Use a clean blending brush to soften the edges of the foil shadow. This creates a seamless transition between the metallic shade and your transition shade, giving your look a polished finish. 6. Highlight the Inner Corners For added dimension, apply a lighter metallic shade or a highlighter to the inner corners of your eyes. This brightens your look and makes your eyes appear larger. 7. Line Your Eyes Use a liquid or gel eyeliner to define your upper lash line. For a more dramatic effect, create a winged liner. You can also apply a dark eyeshadow along the lower lash line for added intensity. 8. Finish with Mascara or Lashes Complete the look with volumizing mascara to define your lashes. If you want extra drama, add a pair of false lashes to enhance the metallic eye makeup. Pro Tips for Perfect Metallic Eye Makeup Conclusion Creating metallic eye makeup looks with foil shadows is easier than you might think. With the right tools, techniques, and a bit of practice, you can achieve dazzling, professional-quality results. Whether you’re heading to a glamorous event or simply want to elevate your everyday makeup, foil shadows are your go-to for a radiant, high-shine finish. Frequently Asked Questions (FAQs) 1. Can I use foil shadows without an eyeshadow primer? While you can use foil shadows without primer, applying a primer ensures better color payoff, prevents creasing, and makes your metallic look last longer. 2. How do I prevent fallout when using foil shadows? To prevent fallout, dampen your brush with setting spray before picking up the shadow. Press the shadow onto your lid instead of sweeping it. 3. Are foil shadows suitable for mature skin? Yes, foil shadows can work beautifully on mature skin. Opt for finer metallic textures and avoid applying too much product to prevent emphasizing fine lines. 4. Can I mix foil shadows with regular eyeshadows? Absolutely! Combining matte or shimmer shadows with foil shadows creates a balanced look and allows for more creative combinations. 5. How do I clean my brushes after using foil shadows? Foil shadows can leave residue on brushes. Use a gentle brush cleanser and lukewarm water to thoroughly clean your tools after use.

How to Create Metallic Eye Makeup Looks with Foil Shadows Read More »

Benefits of Using Hydrating Setting Sprays for Dewy Skin

Benefits of Using Hydrating Setting Sprays for Dewy Skin

A flawless, dewy complexion is the ultimate makeup goal for many. Hydrating setting sprays are the secret weapon that combines makeup longevity with skincare benefits. Designed to lock in moisture while keeping your makeup intact, these sprays are essential for achieving that healthy, lit-from-within glow. Let’s dive into the benefits of hydrating setting sprays and how they elevate your makeup routine. What Are Hydrating Setting Sprays? Hydrating setting sprays are mist-based products that serve a dual purpose: setting your makeup in place and infusing your skin with moisture. Unlike mattifying sprays that focus on oil control, hydrating formulas are packed with skin-loving ingredients like hyaluronic acid, glycerin, and botanical extracts. These sprays are lightweight, non-sticky, and designed to enhance your skin’s natural radiance. They can be used at various stages of your routine – before makeup as a prep step, after makeup to set it, or throughout the day for a refreshing boost. Benefits of Using Hydrating Setting Sprays Boosts Makeup Longevity One of the primary benefits of a hydrating setting spray is its ability to extend the wear of your makeup. The mist creates a protective layer that prevents your foundation, blush, and eyeshadow from fading or creasing. This ensures your makeup looks fresh and flawless, even in humid or dry conditions. It’s an essential step for anyone who wants their makeup to stay put from morning to night. Enhances Skin’s Natural Glow Hydrating setting sprays are formulated to deliver a radiant, dewy finish. Ingredients like glycerin and botanical extracts help reflect light, giving your skin a subtle glow. This dewy effect is perfect for those who want their makeup to look natural and luminous rather than cakey or powdery. Keeps Skin Hydrated Dry skin can make your makeup appear patchy and uneven. Hydrating setting sprays replenish moisture, ensuring your skin stays hydrated throughout the day. Hyaluronic acid, a common ingredient in these sprays, attracts and retains water, keeping your skin plump and refreshed. This is especially beneficial in harsh climates or air-conditioned environments. Reduces the Appearance of Fine Lines Dehydrated skin can make fine lines and wrinkles more noticeable. Hydrating setting sprays help smooth the skin’s surface by providing an instant moisture boost. This creates a more youthful and polished finish, making your makeup look seamless and fresh. Acts as a Mid-Day Refresh Even with the best makeup products, skin can start to look tired after a few hours. Hydrating setting sprays double as a mid-day refresher, reviving your makeup and giving your skin a quick pick-me-up. A few spritzes can instantly brighten your complexion, making you look and feel revitalized. Protects Against Environmental Stressors Many hydrating setting sprays are enriched with antioxidants like vitamin C and green tea extract. These ingredients help protect your skin from environmental stressors such as pollution and UV damage. By incorporating these sprays into your routine, you’re adding an extra layer of defense while enjoying a flawless makeup finish. How to Use Hydrating Setting Sprays Effectively Using a hydrating setting spray is simple, but the technique matters to maximize its benefits. Key Ingredients to Look For in Hydrating Setting Sprays Who Can Benefit From Hydrating Setting Sprays? Hydrating setting sprays are suitable for all skin types, but they’re particularly beneficial for: Conclusion Hydrating setting sprays are a game-changer for anyone seeking a dewy, fresh-faced look. They not only keep your makeup in place but also provide essential skincare benefits. By adding a hydrating setting spray to your routine, you can achieve a glowing, hydrated complexion that lasts all day. Frequently Asked Questions (FAQs) 1. Can I use a hydrating setting spray on bare skin? Yes, hydrating setting sprays can be used on bare skin to boost hydration and add a radiant glow. They’re great for no-makeup days. 2. Will a hydrating setting spray make my skin oily? No, most hydrating setting sprays are lightweight and designed to hydrate without leaving an oily residue. Look for oil-free formulas if you have oily skin. 3. How often should I reapply a hydrating setting spray? You can reapply a hydrating setting spray as needed throughout the day, especially if your skin feels dry or your makeup needs a refresh. 4. Are hydrating setting sprays suitable for oily skin? Yes, they can be suitable for oily skin if you choose a non-comedogenic and lightweight formula. Hydration helps balance oil production. 5. Can a hydrating setting spray replace my moisturizer? While hydrating setting sprays provide moisture, they shouldn’t replace your moisturizer. Use them as a complementary step for added hydration and a dewy finish.

Benefits of Using Hydrating Setting Sprays for Dewy Skin Read More »

Makeup Trends Inspired by Art History

Makeup Trends Inspired by Art History

Art history has always been a source of inspiration for beauty trends. From the bold hues of the Renaissance to the surrealist touches of the 20th century, makeup continues to echo the creativity of famous art movements. These trends offer a unique way to express individuality while celebrating the artistic legacy that has shaped human culture. Let’s dive into how art history has influenced contemporary makeup styles. The Renaissance: Soft and Radiant Elegance The Renaissance, known for its emphasis on natural beauty, inspires timeless and glowing makeup trends. During this period, pale skin was considered a sign of wealth and refinement. To mimic this aesthetic today, many opt for dewy foundations and soft blushes that create a radiant complexion. Renaissance-inspired makeup often includes a focus on rosy cheeks and naturally tinted lips. Think soft pinks and peaches that enhance, rather than mask, the skin’s natural beauty. This trend also emphasizes symmetry and balance, mirroring the ideals of Renaissance art. Modern makeup techniques like contouring and highlighting align well with this aesthetic. The Baroque Era: Dramatic and Ornate Looks The Baroque period brought drama and opulence to the forefront of art and beauty. This era’s influence can be seen in makeup looks that feature rich, jewel-toned eyeshadows and bold, defined eyebrows. These elements create a striking, theatrical effect. Baroque-inspired makeup often includes intricate details, such as metallic accents on the eyelids or dramatic winged eyeliner. These touches reflect the grandeur of Baroque art and architecture. Lips in deep reds or burgundies complete the look, adding a sense of sophistication and mystery. Rococo: Soft Pastels and Playful Charm Rococo art is characterized by its pastel palette and whimsical style, which translate beautifully into makeup trends. Rococo-inspired looks feature soft, powdery colors like baby blue, lavender, and blush pink. These hues can be used for eyeshadows, blushes, or even pastel eyeliner for a playful twist. Subtle shimmer is another hallmark of Rococo makeup. Highlighters with a soft, pearlescent finish add a touch of elegance without overpowering the look. Lips are kept light and glossy, often in shades of peach or nude, to maintain a youthful and fresh appearance. Surrealism: Bold and Avant-Garde Statements The Surrealist art movement embraced the unconventional, inspiring daring and imaginative makeup trends. Surrealist-inspired looks often include asymmetrical designs or unexpected pops of color. For example, one eye might feature a bold graphic liner while the other remains understated. This trend also explores unique textures and shapes. Glitter, rhinestones, or abstract designs drawn onto the face can create a surreal, dreamlike effect. The key to Surrealist makeup is breaking the rules and letting creativity take center stage. This approach allows for truly personalized and artistic expressions. Pop Art: Vivid Colors and Graphic Details Pop Art, with its bold and graphic style, remains a popular influence in makeup. This trend features bright, saturated colors like neon pinks, yellows, and blues. These vibrant shades can be applied to the eyelids, cheeks, or lips for a statement-making look. Graphic eyeliner designs, such as double wings or geometric shapes, also echo the Pop Art aesthetic. These details create a fun and modern twist on classic makeup styles. Lips outlined in contrasting colors or filled with unusual patterns, like polka dots, are another nod to the playful nature of Pop Art. How to Incorporate Art History into Your Makeup Routine Incorporating art-inspired trends doesn’t mean you have to replicate historical looks exactly. Here’s how to make them wearable for everyday life: Conclusion Makeup trends inspired by art history offer a creative way to celebrate the beauty of the past while expressing individuality. From the soft elegance of the Renaissance to the bold statements of Surrealism, these trends bring artistry to everyday life. Whether you prefer subtle nods to history or avant-garde expressions, art-inspired makeup allows you to create looks that are as timeless as they are unique. Frequently Asked Questions (FAQs) 1. Can art-inspired makeup trends be worn daily? Yes, many art-inspired trends can be adapted for everyday wear. For example, soft Renaissance blushes or Rococo pastels are subtle enough for casual looks. 2. What are the best products for achieving Renaissance-inspired makeup? Look for dewy foundations, soft blushes, and tinted lip balms in natural tones. Highlighters can also add a radiant touch. 3. How do I create a Surrealist makeup look? Experiment with asymmetrical designs, bold colors, and unique textures like glitter or rhinestones. Focus on creativity and breaking traditional rules. 4. Which art movement is best for bold makeup lovers? Pop Art and Baroque trends are perfect for bold makeup enthusiasts. They feature vibrant colors, dramatic details, and graphic elements. 5. Can I mix different art-inspired trends in one look? Absolutely! Mixing trends, like combining Rococo pastels with a Pop Art-inspired bold lip, allows you to create a unique and personalized makeup style.

Makeup Trends Inspired by Art History Read More »

Benefits of Using Color-Correcting Concealers for Skin Imperfections

Benefits of Using Color-Correcting Concealers for Skin Imperfections

Color-correcting concealers have revolutionized the way we tackle skin imperfections. Designed to target discoloration and uneven skin tone, these concealers use a strategic application of colors to neutralize specific concerns like redness, dark circles, and dullness. Let’s dive into how they work, their benefits, and why they’re a must-have in your makeup kit. What Are Color-Correcting Concealers? Color-correcting concealers use the principles of color theory to balance unwanted tones in your skin. Each concealer color targets a specific issue: These concealers are typically applied before foundation, creating a smooth, even base. How Color-Correcting Concealers Work The science behind color-correcting concealers lies in the color wheel. Opposite colors on the wheel cancel each other out. For example, green neutralizes red, and orange cancels blue. When applied to the skin, these shades neutralize unwanted tones, allowing your foundation to blend seamlessly without visible discoloration. 1. Green Concealer for Redness Green concealers are ideal for masking redness caused by acne, sunburn, or irritation. Dab a small amount onto the red areas and blend gently for an even-toned finish. 2. Orange and Peach Concealers for Dark Circles Dark circles often have blue or purple undertones. Orange or peach concealers counteract these hues, making the under-eye area look brighter and more awake. 3. Yellow Concealer for Brightening Yellow concealers add warmth and brightness to dull, tired-looking skin. They’re especially useful for under-eye areas and uneven patches. 4. Purple/Lavender Concealer for Yellow Tones If your skin has yellow undertones, a lavender concealer can neutralize them, giving you a more radiant and balanced complexion. 5. Pink Concealer for Fair Skin Pink concealers work well for lighter skin tones to cancel out dark undertones and add a natural, healthy glow. Benefits of Using Color-Correcting Concealers Creates an Even Skin Tone Color-correcting concealers neutralize discoloration, creating a balanced and even base for foundation application. This reduces the need for heavy makeup and enhances your natural look. Minimizes the Appearance of Skin Imperfections These concealers effectively hide blemishes, scars, redness, and dark circles, helping you achieve a flawless finish. Reduces the Need for Excessive Foundation With color correction, you don’t need to layer on as much foundation. This keeps your makeup lightweight and prevents a cakey appearance. Enhances Makeup Longevity By addressing discoloration at the base, color-correcting concealers help your foundation and other makeup products adhere better and last longer throughout the day. Customizable for Individual Needs With a variety of colors available, you can target multiple skin concerns simultaneously. Mixing and matching shades allows for a tailored solution to your unique complexion. How to Use Color-Correcting Concealers Effectively Common Mistakes to Avoid Conclusion Color-correcting concealers are a powerful tool for achieving a flawless complexion. By neutralizing skin imperfections and enhancing the overall look of your makeup, they simplify the process of addressing discoloration and uneven skin tone. With proper application, these concealers can transform your makeup routine, leaving you with a radiant and balanced look. Frequently Asked Questions (FAQs) 1. Do I need to use a color-correcting concealer every day? No, color-correcting concealers are best used when you have specific skin concerns like redness or dark circles. For daily use, a regular concealer may be sufficient. 2. Can I mix color-correcting concealers with foundation? It’s not recommended to mix them directly with foundation. Instead, apply the concealer to problem areas first, then layer your foundation on top. 3. Are color-correcting concealers suitable for sensitive skin? Yes, but choose a formula designed for sensitive skin and patch-test before use to avoid irritation. 4. How do I choose the right shade for my skin concern? Refer to the color wheel: green for redness, orange for dark circles, yellow for dullness, purple for yellow undertones, and pink for fair skin. 5. Can I use color-correcting concealers without foundation? Yes, if you blend well and use minimal product. This works for a natural, no-makeup look.

Benefits of Using Color-Correcting Concealers for Skin Imperfections Read More »

Makeup Tips for Stage Performances: Enhancing Visibility and Expression

Makeup Tips for Stage Performances: Enhancing Visibility and Expression

Stage performances demand makeup that stands out under harsh lighting while accentuating your expressions. Unlike everyday makeup, stage makeup must be bolder and longer-lasting to ensure every detail is visible to the audience. From foundation to finishing touches, here are practical tips to help performers shine on stage with confidence. Why is Stage Makeup Different? Stage makeup differs significantly from regular makeup because it has to combat bright lights and distance. Stage lighting can wash out features, and the audience is often seated far from the performers. To overcome this, stage makeup emphasizes bold colors, heavier application, and techniques that bring out facial expressions. Essential Makeup Tips for Stage Performances 1. Prepping the Skin A well-prepped face ensures makeup stays intact throughout the performance. 2. Choosing the Right Foundation Foundation is the base of any stage makeup look. 3. Defining the Eyes The eyes are the most expressive feature on stage and need to be accentuated. 4. Accentuating the Brows Defined eyebrows frame the face and enhance expressions. 5. Adding Dimension with Contour and Highlight Contouring and highlighting bring out facial features, which can otherwise appear flat under stage lights. 6. Blush for a Natural Flush Blush prevents your face from looking washed out and adds a healthy glow. 7. Perfecting the Lips Bold lips complete the stage makeup look and draw attention to your expressions. 8. Setting the Makeup To ensure your hard work lasts, setting the makeup is a crucial final step. Tips for Different Performance Types Dance Performances Theatrical Performances Musical Performances Conclusion Stage makeup is an art that enhances visibility, emphasizes expressions, and ensures performers shine under bright lights. By following these tips, you’ll be ready to captivate your audience with a polished, long-lasting look. Preparation, bold application, and attention to detail are the keys to success. Frequently Asked Questions (FAQs) 1. How is stage makeup different from everyday makeup? Stage makeup is heavier, bolder, and designed to withstand intense lighting and long hours. It emphasizes features that can otherwise be washed out by stage lights. 2. How can I prevent my makeup from melting during performances? Use a primer, waterproof products, and a setting spray. Blotting papers can also help control shine without disturbing your makeup. 3. Are false eyelashes necessary for stage performances? False lashes are highly recommended as they enhance eye visibility and add drama. Choose a style that complements your look without being uncomfortable. 4. Can I do stage makeup with drugstore products? Yes, many drugstore brands offer high-quality, long-lasting products suitable for stage performances. Focus on full-coverage foundations and pigmented eyeshadows. 5. How far in advance should I apply my stage makeup? Apply your makeup about an hour before the performance to allow for touch-ups and adjustments. Ensure your skin is well-prepped to avoid any last-minute issues.

Makeup Tips for Stage Performances: Enhancing Visibility and Expression Read More »

DIY Makeup Brush Disinfectant Wipes for On-the-Go Hygiene

DIY Makeup Brush Disinfectant Wipes for On-the-Go Hygiene

Keeping your makeup brushes clean is essential for maintaining healthy skin and flawless makeup application. However, cleaning your brushes while on the go can be a challenge. DIY makeup brush disinfectant wipes provide a convenient solution, ensuring your brushes stay fresh and bacteria-free wherever you are. This guide will show you how to make these wipes at home, saving you time and money while promoting better hygiene. Why Clean Makeup Brushes Regularly? Makeup brushes accumulate dirt, oil, and bacteria over time. Using dirty brushes can lead to clogged pores, breakouts, and uneven makeup application. Regular cleaning minimizes these risks and extends the life of your brushes. Disinfectant wipes are especially handy for quick cleaning between applications or when traveling. They help remove surface debris and germs, ensuring your brushes remain hygienic. Benefits of DIY Makeup Brush Disinfectant Wipes Affordable and Convenient Store-bought disinfectant wipes can be expensive, especially if you use them frequently. DIY wipes are cost-effective and can be customized to meet your needs. Gentle on Brushes Commercial wipes may contain harsh chemicals that damage brush bristles over time. Making your own wipes allows you to use gentle, skin-safe ingredients that are brush-friendly. Eco-Friendly Option DIY wipes are an environmentally friendly alternative to single-use store-bought wipes. You can use reusable materials, reducing waste while maintaining hygiene. Materials You’ll Need To create your DIY makeup brush disinfectant wipes, gather the following items: Step-by-Step Guide to Making DIY Makeup Brush Disinfectant Wipes 1. Prepare the Cleaning Solution In a small bowl, mix the following ingredients: Stir the solution well to ensure all ingredients are combined. 2. Soak the Cloths Place the cotton cloths or reusable wipes in a clean bowl. Pour the cleaning solution over the wipes, ensuring they are thoroughly soaked. Let them sit for 5-10 minutes to absorb the solution. 3. Store the Wipes Transfer the soaked wipes into an airtight container. Make sure the container seals properly to prevent the wipes from drying out. Label the container with the date to keep track of freshness. 4. Use as Needed To clean your makeup brushes, simply take a wipe and gently rub the bristles. Focus on removing makeup residue and bacteria. Let the brush air dry before using it again. Tips for Using DIY Makeup Brush Disinfectant Wipes Don’t Over-Saturate Your Brushes While disinfectant wipes are effective, avoid over-saturating your brushes with the solution. Excess liquid can loosen the glue holding the bristles in place. Use Separate Wipes for Different Brushes To prevent cross-contamination, use a separate wipe for each brush. This ensures better hygiene and cleaning efficiency. Store Wipes Properly Keep your wipes in a cool, dry place to maintain their effectiveness. Avoid exposing them to direct sunlight or heat. How Often Should You Clean Your Brushes? Conclusion DIY makeup brush disinfectant wipes are a practical, affordable, and eco-friendly solution for maintaining clean brushes on the go. With just a few simple ingredients, you can create wipes that are gentle on your brushes and tough on germs. Incorporating this quick cleaning routine into your skincare and makeup regimen can help prevent breakouts and ensure flawless makeup application. Frequently Asked Questions (FAQs) 1. Can I use regular wipes instead of making my own? While regular wipes may clean surface dirt, they often lack the disinfecting properties needed to remove bacteria effectively. DIY wipes are specifically formulated to clean and sanitize makeup brushes. 2. How long can I store DIY disinfectant wipes? Homemade disinfectant wipes can be stored for up to a month in an airtight container. Ensure the container is sealed properly to prevent drying out. 3. Is it safe to use these wipes on all types of makeup brushes? Yes, the DIY solution is safe for both synthetic and natural bristle brushes. However, avoid soaking wooden handles to prevent damage. 4. Can I skip the essential oil in the recipe? Yes, the essential oil is optional. It’s added for fragrance and additional antibacterial properties, but the solution works effectively without it. 5. What’s the best way to deep clean brushes if disinfectant wipes aren’t enough? For a deep clean, wash brushes with warm water and gentle soap. Rinse thoroughly and let them air dry with the bristles facing downward to prevent water from damaging the brush handles.

DIY Makeup Brush Disinfectant Wipes for On-the-Go Hygiene Read More »