Blog

How to Create DIY Hair Perfume Mists with Essential Oils

How to Create DIY Hair Perfume Mists with Essential Oils

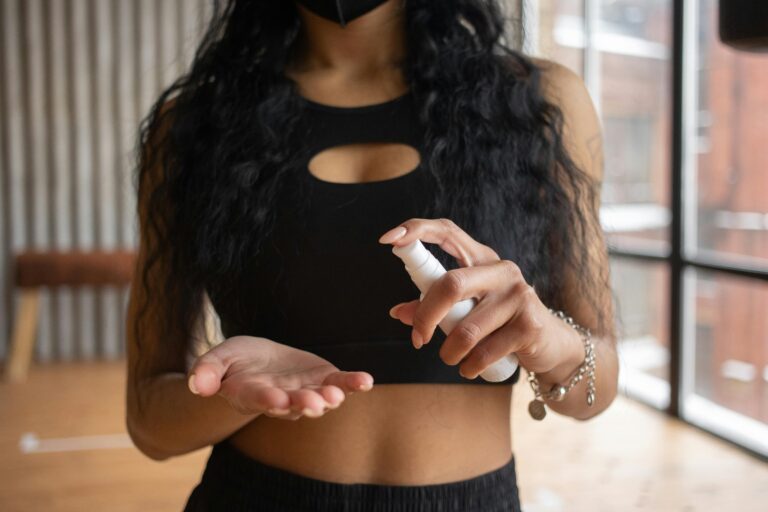
DIY hair perfume mists are a simple and creative way to keep your hair smelling fresh while also benefiting from the nourishing properties of essential oils. These mists are easy to make, customizable, and free from harsh chemicals. In this guide, we’ll walk you through the steps to create your personalized hair perfume mist using essential oils and a few basic ingredients. Benefits of Hair Perfume Mists with Essential Oils Hair perfume mists offer more than just fragrance. Essential oils provide a range of benefits for your hair and scalp: Ingredients You’ll Need Before starting, gather the following items: Recommended Essential Oils for Hair Perfume Mists Step-by-Step Guide to Creating Your Hair Perfume Mist Step 1: Prepare Your Spray Bottle Choose a clean, small spray bottle. A glass bottle is preferable as it preserves the properties of essential oils better than plastic. Step 2: Add Distilled Water Fill about three-quarters of the bottle with distilled water or rose water. Distilled water ensures your mist remains free from impurities. Step 3: Mix in Witch Hazel or Vodka Add one to two teaspoons of witch hazel or vodka. This ingredient helps disperse the oils evenly in the water and acts as a natural preservative. Step 4: Select and Add Essential Oils Choose 2-3 essential oils based on your desired scent and hair benefits. Add about 10-15 drops of essential oils in total. For instance, you can combine 5 drops of lavender, 5 drops of orange, and 5 drops of rosemary. Step 5: Shake the Mixture Secure the spray bottle cap and shake well to combine all ingredients. The oils should disperse evenly in the liquid. Step 6: Test and Adjust Spray a small amount on your hair and adjust the formula if needed. You can add more essential oils for a stronger scent or dilute it with more water if the fragrance is too strong. Step 7: Store Your Hair Mist Store the mist in a cool, dark place to preserve its fragrance and effectiveness. Use it within 2-3 months for the best results. Tips for Using Your DIY Hair Perfume Mist Customizing Your Hair Perfume Mist You can tailor your mist to suit your needs: Conclusion Creating your own DIY hair perfume mist is a fun and practical way to keep your hair smelling amazing while enjoying the benefits of essential oils. With just a few ingredients and steps, you can craft a personalized mist that suits your style and needs. Try it today and elevate your hair care routine with natural, nourishing fragrances. Frequently Asked Questions (FAQs) 1. How long does a DIY hair perfume mist last? Your DIY hair perfume mist can last up to 3 months if stored in a cool, dark place. Shake it before each use to ensure the oils are evenly mixed. 2. Can I use tap water instead of distilled water? Distilled water is recommended as it’s free from impurities that may affect the quality and longevity of your mist. 3. Are essential oils safe for all hair types? Most essential oils are safe when diluted properly. However, do a patch test before using the mist, especially if you have sensitive skin or allergies. 4. Can I use the mist on wet hair? Yes, you can spray it on damp or dry hair. Applying it to damp hair helps lock in the fragrance. 5. What’s the purpose of witch hazel or vodka in the mist? Witch hazel or vodka helps to disperse the essential oils evenly in water and acts as a preservative to extend the mist’s shelf life.

How to Create DIY Hair Perfume Mists with Essential Oils Read More »

Benefits of Using Baobab Oil for Hair Nourishment and Repair

Benefits of Using Baobab Oil for Hair Nourishment and Repair

Baobab oil, derived from the seeds of the baobab tree, is a nutrient-rich oil celebrated for its exceptional benefits for hair health. Packed with essential vitamins, fatty acids, and antioxidants, this natural remedy has become a go-to solution for those seeking to repair damaged hair and boost nourishment. Whether your hair is dry, brittle, or in need of extra care, baobab oil offers a versatile solution to rejuvenate and protect. What is Baobab Oil? Baobab oil is extracted from the seeds of the baobab fruit, often referred to as the “Tree of Life” in Africa. The oil is lightweight, non-greasy, and easily absorbed, making it ideal for hair care. Rich in omega fatty acids, vitamins A, D, E, and F, and antioxidants, it provides deep hydration, protection, and nourishment to the hair and scalp. Key Benefits of Using Baobab Oil for Hair Baobab oil offers a variety of benefits that cater to different hair needs, from hydration to repair and protection. Here’s how it works: 1. Deep Hydration for Dry Hair Baobab oil is an excellent moisturizer, penetrating the hair shaft and sealing in moisture. This helps combat dryness and keeps hair feeling soft, smooth, and manageable. Its high content of omega fatty acids ensures long-lasting hydration, reducing frizz and restoring shine. Unlike heavier oils, baobab oil doesn’t weigh hair down, making it suitable for all hair types. 2. Repairs Damaged Hair Frequent styling, heat, and chemical treatments can leave hair weak and damaged. Baobab oil’s rich composition of vitamins and fatty acids promotes hair repair by strengthening the strands and reducing breakage. The oil restores elasticity, which is essential for minimizing split ends and maintaining a healthy appearance. 3. Scalp Nourishment and Health Healthy hair starts with a healthy scalp. Baobab oil has anti-inflammatory and soothing properties that help alleviate dryness, flakiness, and irritation on the scalp. Its antioxidant content protects the scalp from environmental stressors, encouraging the growth of stronger, healthier hair. 4. Protects Against Environmental Damage Baobab oil acts as a protective barrier against UV rays, pollution, and other environmental aggressors. These factors can weaken hair over time, leading to dullness and breakage. Applying baobab oil regularly shields your hair from damage while keeping it nourished and vibrant. 5. Boosts Shine and Smoothness Baobab oil adds a natural shine to the hair, making it look healthier and more vibrant. It also tames flyaways and smooths the cuticle, giving your hair a polished and sleek appearance. How to Use Baobab Oil for Hair Incorporating baobab oil into your hair care routine is easy and versatile. Here are a few effective methods: As a Pre-Shampoo Treatment Apply a generous amount of baobab oil to dry hair, focusing on the ends and damaged areas. Leave it on for 30 minutes or overnight for deeper hydration. Rinse and follow with shampoo and conditioner. As a Leave-In Conditioner Use a small amount of baobab oil on damp hair to lock in moisture and protect against frizz. Focus on the mid-lengths and ends for best results. As a Scalp Treatment Massage a few drops of baobab oil into your scalp to soothe irritation and promote circulation. Leave it on for 15-20 minutes before washing your hair. As a Styling Product Apply a small amount of baobab oil to dry hair to tame flyaways, enhance shine, and protect against heat damage from styling tools. Is Baobab Oil Suitable for All Hair Types? Baobab oil’s lightweight formula makes it suitable for all hair types, including straight, curly, fine, and thick hair. It’s particularly beneficial for dry, damaged, and color-treated hair due to its nourishing and reparative properties. If you have oily hair, use sparingly to avoid buildup. Conclusion Baobab oil is a natural powerhouse for hair nourishment and repair. From deep hydration to protection and repair, it addresses various hair concerns, leaving your hair healthier, shinier, and more manageable. Incorporating baobab oil into your routine is a simple yet effective way to revitalize your hair and scalp. Frequently Asked Questions (FAQs) 1. Can I use baobab oil daily? While baobab oil is gentle, it’s best to use it 2-3 times a week to avoid buildup. Adjust based on your hair’s needs. 2. Is baobab oil safe for color-treated hair? Yes, baobab oil is safe for color-treated hair. Its nourishing properties can help maintain color vibrancy and repair damage caused by dyeing. 3. How long does it take to see results with baobab oil? You may notice improved hydration and shine after a few uses. For significant repair and nourishment, consistent use over a few weeks is recommended. 4. Can baobab oil help with hair growth? While baobab oil doesn’t directly stimulate hair growth, it promotes a healthy scalp and strengthens hair, creating optimal conditions for growth. 5. Is baobab oil suitable for oily hair? Yes, but use it sparingly. Focus on the ends and avoid the roots to prevent excess oiliness.

Benefits of Using Baobab Oil for Hair Nourishment and Repair Read More »

Benefits of Using Eye Creams with Vitamin K

Benefits of Using Eye Creams with Vitamin K

Eye creams with Vitamin K are becoming a go-to solution for those looking to improve the delicate skin around their eyes. Known for its role in blood clotting and circulation, Vitamin K has unique benefits for addressing common under-eye concerns like dark circles, puffiness, and fine lines. Let’s delve into why this ingredient deserves a spot in your skincare routine. What Makes Vitamin K Special for Eye Care? Vitamin K is a fat-soluble vitamin essential for proper blood flow and clotting. When applied topically, it has the ability to improve microcirculation in the under-eye area, which is a common problem leading to dark circles and puffiness. This powerhouse ingredient also strengthens capillaries, reducing the visibility of discoloration and promoting a healthier, more even complexion. Its soothing properties make it ideal for the delicate skin under the eyes. How Eye Creams with Vitamin K Work The skin around the eyes is thinner and more prone to issues like discoloration, swelling, and fine lines. Vitamin K-based eye creams target these concerns through the following mechanisms: 1. Improves Circulation Dark circles often result from poor circulation. Vitamin K enhances blood flow, reducing the pooling of blood under the eyes that causes discoloration. 2. Reduces Puffiness By strengthening capillaries and improving fluid drainage, Vitamin K helps reduce puffiness and swelling around the eyes. This creates a more refreshed and awake appearance. 3. Minimizes Fine Lines Eye creams with Vitamin K often include hydrating ingredients that work in tandem to improve elasticity and reduce the appearance of fine lines and crow’s feet. 4. Brightens Skin Tone Vitamin K lightens pigmentation under the eyes by reducing the visibility of blood vessels and discoloration, leaving the skin brighter and more even. Key Benefits of Eye Creams with Vitamin K Incorporating an eye cream with Vitamin K into your skincare routine can bring transformative results. Here’s why: Brightens Dark Circles One of the standout benefits of Vitamin K is its ability to fade dark circles. By boosting circulation and addressing blood vessel visibility, it reduces discoloration effectively. Decreases Swelling Tired, puffy eyes can be a thing of the past. Vitamin K’s anti-inflammatory properties calm swelling and make the skin appear smoother and firmer. Prevents Premature Aging By hydrating and strengthening the delicate skin around the eyes, Vitamin K helps delay signs of aging. Fine lines and wrinkles become less noticeable over time. Enhances Skin Repair Vitamin K accelerates the healing of damaged or fragile skin. It’s particularly useful after procedures like fillers or laser treatments to minimize bruising. Gentle on Sensitive Skin Many eye creams with Vitamin K are formulated to suit even the most sensitive skin types, making them a versatile choice for all users. How to Use Eye Creams with Vitamin K Effectively For the best results, follow these simple steps: Choosing the Right Eye Cream with Vitamin K When selecting an eye cream, look for additional ingredients that complement Vitamin K. Some key options include: Always opt for a product that suits your skin type and addresses your specific concerns. Potential Side Effects and Precautions While Vitamin K is generally safe for topical use, there are a few things to keep in mind: Conclusion Eye creams with Vitamin K are a game-changer for improving the appearance of dark circles, puffiness, and fine lines. With consistent use, this ingredient can brighten your under-eye area and promote healthier skin. Add a Vitamin K-infused eye cream to your routine for a noticeable difference in your skincare results. Frequently Asked Questions (FAQs) 1. What makes Vitamin K effective for dark circles? Vitamin K improves blood flow and strengthens capillaries, reducing the pooling of blood that causes dark circles. It also lightens pigmentation, making the under-eye area brighter. 2. Can Vitamin K eye creams be used daily? Yes, Vitamin K eye creams are safe for daily use. For best results, apply them twice a day—in the morning and evening. 3. Are there any side effects of using Vitamin K eye creams? When used correctly, side effects are rare. However, some individuals may experience mild irritation or allergic reactions. Perform a patch test before full application. 4. Can Vitamin K eye creams help with wrinkles? While Vitamin K primarily targets dark circles and puffiness, it also hydrates and supports skin elasticity, which can reduce the appearance of fine lines and wrinkles. 5. How long does it take to see results from a Vitamin K eye cream? Results vary, but most users notice improvements within 4-6 weeks of consistent use. For long-term benefits, continue using the cream as part of your daily skincare routine.

Benefits of Using Eye Creams with Vitamin K Read More »

Art of Eye Sculpting: Defining and Enhancing Eye Shape with Makeup

Art of Eye Sculpting: Defining and Enhancing Eye Shape with Makeup

Makeup has the power to transform, highlight, and enhance our natural features, and no feature is more expressive than the eyes. Eye sculpting is a specialized technique that defines and enhances the shape of your eyes using makeup. Whether you want to create depth, lift, or widen your eyes, mastering this art can elevate your makeup game to the next level. In this guide, we’ll explore the best techniques for sculpting and defining eye shapes, ensuring you bring out their unique beauty with ease. Understanding Your Eye Shape The first step to mastering eye sculpting is understanding your eye shape. Each shape requires tailored techniques to achieve a balanced, enhanced look. Here are some common eye shapes and their characteristics: Identifying your eye shape helps you determine the most flattering techniques and products for sculpting. Techniques for Eye Sculpting 1. Using Light and Shadow for Definition The art of eye sculpting relies on the strategic placement of light and shadow to add depth and dimension. 2. Eyeliner Techniques for Eye Shapes Eyeliner plays a crucial role in defining and sculpting your eyes. Different styles suit different eye shapes: 3. Creating Depth with Eyeshadow Eyeshadow placement can dramatically change the perception of your eye shape. 4. Highlighting the Brow Bone and Inner Corners Highlighting adds a finishing touch that lifts and brightens the eyes. 5. Mascara and Lashes for Sculpting The right mascara and lashes can enhance eye shape significantly. Tools for Eye Sculpting Having the right tools ensures precision and ease: Common Mistakes to Avoid Conclusion Eye sculpting is a powerful technique that allows you to define and enhance your eyes with makeup. By understanding your unique eye shape and applying the right techniques, you can create stunning looks that highlight your natural beauty. With a little practice and the right tools, the art of eye sculpting can become a transformative part of your makeup routine. Frequently Asked Questions (FAQs) 1. Can I sculpt my eyes without using eyeliner? Yes, you can use eyeshadow to define and contour your eyes. A dark shade applied close to the lash line can mimic the effect of eyeliner. 2. How do I avoid making my eyes look smaller? Focus on brightening techniques, such as using light shades on the lid and inner corners. Avoid overloading the lower lash line with dark colors. 3. What’s the best way to sculpt hooded eyes? Use light shades on the lid and a darker shade slightly above the natural crease to create the illusion of depth. 4. How do I ensure my makeup lasts all day? Use an eyeshadow primer to prevent creasing and a setting spray to lock your look in place. 5. Are false lashes necessary for eye sculpting? No, but they can enhance the look. If you prefer a natural approach, focus on lengthening and volumizing mascara for a similar effect.

Art of Eye Sculpting: Defining and Enhancing Eye Shape with Makeup Read More »

Benefits of Using Hydrogel Eye Patches

Benefits of Using Hydrogel Eye Patches

Hydrogel eye patches have become a staple in many skincare routines and for a good reason. These convenient, gel-based pads are designed to target the delicate under-eye area, offering hydration, soothing tired eyes, and reducing puffiness. Easy to use and highly effective, they are an excellent addition to your self-care regimen. Let’s dive into the many benefits of using hydrogel eye patches and how they can enhance your skincare routine. What Are Hydrogel Eye Patches? Hydrogel eye patches are thin, gel-like pads infused with beneficial ingredients like hyaluronic acid, peptides, and botanical extracts. These patches are designed to fit comfortably under the eyes, delivering targeted hydration and nutrients directly to the skin. The gel material allows for better adherence to the skin and gradual absorption of the active ingredients. This ensures maximum effectiveness while providing a cooling, calming effect on the delicate under-eye area. Benefits of Hydrogel Eye Patches 1. Hydration Boost for Dry Skin The skin under your eyes is thinner and more prone to dryness than other parts of your face. Hydrogel eye patches are packed with hydrating ingredients like hyaluronic acid and glycerin that deeply moisturize the skin. This added hydration helps plump up fine lines, giving your under-eye area a smoother, more youthful appearance. 2. Reduces Puffiness and Swelling Hydrogel eye patches are often stored in the refrigerator to enhance their cooling effect. The cold temperature, combined with anti-inflammatory ingredients like caffeine or green tea extract, reduces puffiness and swelling. This is particularly beneficial after a poor night’s sleep or long hours staring at a screen. 3. Minimizes the Appearance of Dark Circles Many people are concerned about dark circles. Hydrogel eye patches containing ingredients like niacinamide and vitamin C can brighten the under-eye area, reducing the visibility of dark circles over time. Regular use can help create a more awake and refreshed appearance. 4. Soothes and Calms Tired Eyes After a long day, hydrogel eye patches provide an immediate cooling sensation that soothes tired eyes. This calming effect is perfect for reducing tension and providing a moment of relaxation. 5. Enhances Skin Elasticity Hydrogel eye patches often contain peptides and collagen-boosting ingredients that improve skin elasticity. This helps the under-eye area appear firmer and reduces the appearance of sagging over time. 6. Improves Makeup Application Hydrogel eye patches prepare the skin under your eyes by providing hydration and smoothing the area. This creates a better base for concealer and prevents makeup from creasing, ensuring a flawless finish. How to Use Hydrogel Eye Patches Effectively To get the most out of your hydrogel eye patches, follow these steps: Tips for Best Results Ingredients to Look For in Hydrogel Eye Patches The effectiveness of hydrogel eye patches largely depends on their ingredients. Here are some key ones to look for: Are Hydrogel Eye Patches Suitable for Everyone? Hydrogel eye patches are generally safe for most skin types. However, if you have sensitive skin or allergies, it’s essential to check the ingredient list before use. Opt for fragrance-free patches if you are prone to irritation. Always perform a patch test to ensure compatibility with your skin. Conclusion Hydrogel eye patches offer a quick and effective solution for addressing common under-eye concerns like dryness, puffiness, and dark circles. With regular use, they can hydrate, brighten, and revitalize your under-eye area, making them an indispensable part of your skincare routine. Easy to use and packed with skin-loving ingredients, these patches are a must-try for anyone seeking refreshed and rejuvenated eyes. Frequently Asked Questions (FAQs) 1. How often should I use hydrogel eye patches? You can use hydrogel eye patches 2-3 times a week or whenever your under-eye area needs extra care. Some people prefer daily use for optimal hydration. 2. Can I reuse hydrogel eye patches? No, hydrogel eye patches are designed for single use. Reusing them can reduce effectiveness and may introduce bacteria to your skin. 3. Are hydrogel eye patches better than regular eye creams? Hydrogel eye patches provide targeted, intensive treatment and are ideal for quick results. Eye creams, on the other hand, offer long-term maintenance. Combining both can maximize benefits. 4. Can I wear hydrogel eye patches overnight? Most hydrogel eye patches are not designed for overnight use. Leaving them on too long can cause the gel to dry out and potentially irritate your skin. 5. Do hydrogel eye patches work for dark circles? Yes, hydrogel eye patches with brightening ingredients like niacinamide or vitamin C can help reduce the appearance of dark circles with consistent use.

Benefits of Using Hydrogel Eye Patches Read More »

Benefits of Using Ice Rollers for Cooling and Depuffing

Benefits of Using Ice Rollers for Cooling and Depuffing

Ice rollers have become a go-to tool for skincare enthusiasts seeking an easy, effective way to refresh their skin. These handheld devices, filled with cooling gel or water, provide instant relief from puffiness, redness, and dullness. Whether you use them after waking up or during your skincare routine, ice rollers offer multiple benefits that enhance skin health and appearance. Let’s dive into how this simple tool can transform your skincare routine. What is an Ice Roller? An ice roller is a portable skincare tool designed to deliver a cooling effect on the skin. The roller head is typically made of stainless steel or plastic and is filled with a gel that stays cold after being placed in the freezer. Some designs also use water-filled chambers for a similar effect. This tool is rolled gently over the face, neck, and other areas to reduce swelling, soothe irritation, and boost circulation. Its simplicity and effectiveness have made it a staple in many skincare routines. Benefits of Using Ice Rollers Ice rollers offer a wide range of benefits for the skin. Here are some of the key advantages: Reduces Puffiness The cold temperature of the ice roller constricts blood vessels, which helps to reduce swelling and puffiness. This is especially effective for morning puffiness or after a long day. Rolling the tool under your eyes can minimize under-eye bags and leave you looking more awake and refreshed. Soothes Irritation and Redness If you have sensitive or inflamed skin, an ice roller can help. The cooling effect calms irritation and reduces redness caused by sunburn, rosacea, or even over-exfoliation. This makes it an excellent tool for soothing the skin after procedures like dermaplaning or waxing. Improves Circulation for a Healthy Glow Using an ice roller stimulates blood flow to the skin. Improved circulation delivers oxygen and nutrients to your skin cells, enhancing their function. As a result, your skin looks healthier, brighter, and more radiant. Minimizes the Appearance of Pores Cold temperatures temporarily tighten the skin and reduce the size of pores. Rolling an ice roller over your face before applying makeup can create a smoother canvas. This can help your foundation and other products glide on seamlessly. Relieves Facial Tension Many of us unknowingly hold tension in our facial muscles, leading to discomfort and even headaches. Ice rolling helps relax these muscles, providing relief and reducing stress. This can be particularly beneficial if you experience jaw tension or frequent migraines. How to Use an Ice Roller Ice rollers are incredibly easy to use, but proper technique ensures maximum benefits. Here are the steps to follow: Is Ice Rolling Suitable for Everyone? While ice rolling is generally safe, it may not be suitable for everyone. People with extremely sensitive skin or certain skin conditions, like frostbite-prone skin or severe rosacea, should consult a dermatologist first. Always avoid using an ice roller on broken or irritated skin to prevent further damage. Conclusion Ice rollers are a simple yet powerful tool for cooling and depuffing the skin. From reducing redness to improving circulation, they offer a variety of benefits that enhance your overall skin health. Incorporating an ice roller into your skincare routine is an easy way to achieve a refreshed, glowing complexion. Frequently Asked Questions (FAQs) 1. How long should I use an ice roller on my face? You can use an ice roller for 5-10 minutes, focusing on each area for about 1-2 minutes. Avoid overuse to prevent skin sensitivity. 2. Can I use an ice roller every day? Yes, ice rollers can be used daily, especially in the morning or after a long day. However, listen to your skin and reduce frequency if irritation occurs. 3. Do I need to use skincare products with an ice roller? While not mandatory, using a serum or moisturizer with an ice roller helps it glide smoothly and enhances product absorption. 4. Can ice rollers help with acne? Ice rollers can reduce inflammation and redness associated with acne. However, avoid rolling directly over active breakouts to prevent irritation. 5. How do I clean my ice roller? Wash the roller head with warm water and mild soap after each use. Ensure it is completely dry before placing it back in the freezer.

Benefits of Using Ice Rollers for Cooling and Depuffing Read More »

How to Create a Skincare Shelfie for Instagram-Worthy Display

How to Create a Skincare Shelfie for Instagram-Worthy Display

A beautifully organized skincare shelf isn’t just practical—it’s a work of art that can elevate your self-care routine. Skincare shelfies have taken over Instagram, showcasing perfectly arranged products, stylish decor, and pristine setups. If you’ve ever wanted to create your own Instagram-worthy skincare display, this guide will walk you through every step to get there. What is a Skincare Shelfie? A skincare shelfie is a photo-worthy display of your skincare products, often arranged on shelves or counters. It’s more than just showcasing your collection—it’s about creating a visually appealing setup that highlights your personal style and self-care routine. Skincare shelfies reflect a balance of functionality and aesthetics, turning ordinary storage into a curated display. Step-by-Step Guide to Creating a Skincare Shelfie 1. Choose the Right Location The first step to creating a skincare shelfie is finding the perfect spot. Ideally, choose a well-lit area, as natural light enhances the visual appeal of your display. Shelves, countertops, or vanity tops work best for skincare shelfies. Make sure the space is easy to access and has enough room for your products without looking cluttered. 2. Declutter and Organize Before arranging your products, take time to declutter your collection. Remove expired products or items you no longer use. Group your skincare products into categories, such as cleansers, serums, moisturizers, and treatments. This organization not only helps you find items easily but also creates a visually cohesive display. 3. Invest in Stylish Storage Solutions Use storage solutions like trays, jars, or acrylic organizers to keep everything neat. Trays are great for grouping items, while clear organizers work well for serums and bottles. Consider adding small baskets or chic containers for items like cotton pads or tools. Choose neutral or matching tones to maintain a clean, cohesive look. 4. Incorporate Decorative Elements Add personality to your shelfie with decorative elements. Use plants, candles, or small vases to bring life and texture to your display. Minimalistic decor complements most skincare setups, but you can also add unique pieces that reflect your personal style. Avoid overloading the space with decorations to keep the focus on your products. 5. Arrange Your Products Thoughtfully When it comes to arranging your products, less is more. Start with larger items like creams and jars at the back and place smaller items, like serums, at the front. Play with heights by using risers or stackable trays. This layering technique adds depth and makes your display more dynamic. Keep your favorite or most aesthetically pleasing products prominently displayed for added visual impact. 6. Pay Attention to Lighting Lighting is key to capturing an Instagram-worthy shelfie. Natural light works best, so try placing your setup near a window. If natural light isn’t available, use soft, warm artificial lighting. Avoid harsh lighting, as it can cast shadows and make your display look less inviting. 7. Clean and Maintain A dusty or messy setup won’t impress anyone. Regularly clean your shelves, wipe down bottles, and dust any decor. Replace empty products promptly and reorganize as needed to keep your shelfie looking fresh and photo-ready. Pro Tips for Instagram-Worthy Shelfies Conclusion Creating a skincare shelfie isn’t just about showing off your products—it’s about combining organization and creativity to craft a display that inspires self-care. With the right location, storage solutions, and thoughtful arrangements, your shelfie can become the perfect blend of function and style. Start designing your skincare shelfie today and watch it transform into an Instagram-worthy masterpiece. Frequently Asked Questions (FAQs) 1. Do I need expensive products for a skincare shelfie? No, you don’t need expensive products to create an appealing shelfie. Focus on organizing and arranging what you already own in a stylish way. 2. How do I keep my shelfie looking clean? Regularly dust your shelves, wipe product bottles, and declutter unused or empty items to maintain a tidy display. 3. Can I create a shelfie in a small space? Yes, even small spaces can look amazing with the right organization. Use vertical storage or tiered trays to maximize space. 4. What lighting works best for photos? Natural light is ideal, but soft artificial lighting can also work well. Avoid harsh or direct lighting that creates shadows. 5. How often should I rearrange my shelfie? You can rearrange your shelfie whenever you add new products or decor, or simply to refresh the look. Regular updates keep it interesting.

How to Create a Skincare Shelfie for Instagram-Worthy Display Read More »

Skincare Tips for Hikers: Protecting Against Sun and Wind Exposure

Skincare Tips for Hikers: Protecting Against Sun and Wind Exposure

Hiking is an incredible way to connect with nature, but it can be harsh on your skin. Prolonged exposure to the sun, wind, and dry air can leave your skin dehydrated, irritated, and damaged. Fortunately, with the right skincare routine, you can enjoy your adventures while keeping your skin healthy and protected. Here’s how to safeguard your skin from the elements when hitting the trails. Pre-Hike Skincare Routine Preparing your skin before a hike is just as important as packing the right gear. Taking preventive measures can help minimize damage and keep your skin in optimal condition. 1. Cleanse Your Skin Start with a gentle cleanser to remove dirt, oil, and impurities. This creates a clean base for protective products and ensures your skin can breathe throughout the hike. 2. Apply Sunscreen Choose a broad-spectrum sunscreen with SPF 50 or higher. Look for a water-resistant formula to ensure lasting protection, even if you sweat. Apply generously to all exposed areas, including your face, neck, and hands. 3. Use a Hydrating Moisturizer A lightweight moisturizer with hydrating ingredients like hyaluronic acid or glycerin can lock in moisture and create a barrier against dry air and wind. 4. Protect Your Lips Don’t forget about your lips. Use a lip balm with SPF to prevent chapping and sunburn. Skincare Tips During Your Hike Once you’re on the trail, staying mindful of your skin can help prevent discomfort and long-term damage. Reapply Sunscreen Every Two Hours Sweat and sun exposure can reduce sunscreen’s effectiveness. Reapply every two hours to maintain protection. If you’re using a spray or stick sunscreen, it’s easy to reapply without stopping for long. Stay Hydrated Dehydration can make your skin look dull and dry. Carry enough water and drink frequently to keep your skin and body hydrated. Wear Protective Gear Wide-brimmed hats, sunglasses with UV protection, and lightweight, long-sleeved clothing can shield your skin from direct sunlight and wind exposure. Post-Hike Skincare Routine After a long day outdoors, your skin needs some extra care to recover and rejuvenate. 1. Cleanse and Soothe Gently wash your face with a mild cleanser to remove dirt, sweat, and sunscreen residue. If your skin feels irritated, use a soothing toner with ingredients like aloe vera or chamomile. 2. Rehydrate Apply a rich moisturizer or hydrating serum to replenish lost moisture. Look for products with antioxidants like vitamin C to combat free radical damage from sun exposure. 3. Treat Sunburn (If Necessary) If you notice any redness or sunburn, use a cooling gel with aloe vera to soothe the skin. Avoid further sun exposure until your skin heals. 4. Focus on Your Lips Reapply a nourishing lip balm to restore moisture and repair any dryness or cracking. Additional Tips for Skin Protection Here are a few more tips to keep your skin healthy and glowing during and after your hike: Conclusion Protecting your skin from sun and wind exposure while hiking doesn’t have to be complicated. With a proper skincare routine before, during, and after your hike, you can minimize damage and keep your skin healthy. By taking these simple steps, you can fully enjoy your outdoor adventures without compromising your skin’s well-being. Frequently Asked Questions (FAQs) 1. How much sunscreen should I apply before hiking? You should use about a teaspoon of sunscreen for your face and at least an ounce (a shot glass) for your entire body. Apply 15 minutes before heading out. 2. Can I use makeup with SPF instead of sunscreen? Makeup with SPF is not a substitute for sunscreen. While it provides some protection, it’s usually not applied in sufficient amounts to be effective. 3. How do I prevent windburn while hiking? To prevent windburn, wear a scarf or buff to cover your face, and apply a thick moisturizer or barrier cream to exposed skin. 4. What should I do if I get sunburned on a hike? If you get sunburned, soothe your skin with aloe vera gel or a cooling lotion. Stay out of the sun until the redness subsides. 5. Is sunscreen necessary on cloudy days? Yes, sunscreen is essential even on cloudy days, as up to 80% of UV rays can penetrate clouds and still damage your skin.

Skincare Tips for Hikers: Protecting Against Sun and Wind Exposure Read More »

Benefits of Using Tamanu Oil for Healing and Regeneration

Benefits of Using Tamanu Oil for Healing and Regeneration

Tamanu oil, derived from the nuts of the tamanu tree, has been used for centuries as a natural remedy for a variety of skin concerns. This versatile oil is known for its ability to promote healing, reduce scars, and support skin regeneration. With its rich composition of fatty acids and antioxidants, tamanu oil is a powerful addition to any skincare routine. Let’s delve into its remarkable benefits and how it works to heal and rejuvenate your skin. What is Tamanu Oil? Tamanu oil is extracted from the kernels of the tamanu tree, native to Southeast Asia and the Pacific Islands. Known for its anti-inflammatory and antimicrobial properties, it has been traditionally used to treat wounds, burns, and other skin ailments. The oil’s unique composition includes fatty acids, calophyllolide (an anti-inflammatory agent), and lactone (an antibiotic compound). These components make tamanu oil highly effective in healing damaged skin and promoting regeneration. Healing Properties of Tamanu Oil 1. Reduces Scars and Stretch Marks Tamanu oil is renowned for its ability to reduce the appearance of scars and stretch marks. Its high concentration of fatty acids promotes the growth of new skin cells, helping to repair damaged tissue. With consistent use, scars can fade significantly over time. 2. Accelerates Wound Healing Thanks to its antibacterial and anti-inflammatory properties, tamanu oil speeds up the healing process for minor cuts, scrapes, and burns. It creates a protective barrier over the wound while soothing inflammation, allowing the skin to heal naturally. 3. Soothes Irritated Skin Tamanu oil is gentle enough for sensitive skin and helps calm irritation caused by conditions like eczema, psoriasis, or rosacea. Its moisturizing properties restore the skin’s natural barrier, reducing redness and discomfort. 4. Fights Acne and Blemishes The antimicrobial compounds in tamanu oil make it an effective treatment for acne. It helps reduce bacterial growth while soothing inflamed pimples and preventing further breakouts. 5. Relieves Sunburn Tamanu oil’s soothing and regenerative properties make it ideal for treating sunburned skin. It hydrates and nourishes while promoting faster recovery from UV damage. Regenerative Benefits of Tamanu Oil Improves Skin Elasticity Tamanu oil penetrates deeply into the skin, stimulating collagen production and enhancing elasticity. This helps reduce the appearance of fine lines and wrinkles, leaving the skin firmer and smoother. Hydrates and Nourishes the Skin Rich in essential fatty acids, tamanu oil provides deep hydration. It locks in moisture, leaving the skin soft, plump, and rejuvenated. Protects Against Environmental Damage The antioxidants in tamanu oil, such as xanthones and coumarins, protect the skin from free radicals and environmental stressors. This helps prevent premature aging and keeps the skin looking youthful. Evens Out Skin Tone Tamanu oil can help fade hyperpigmentation and dark spots, resulting in a more even complexion. Its natural skin-lightening properties make it a popular choice for reducing discoloration. How to Use Tamanu Oil Safety Precautions Conclusion Tamanu oil is a powerhouse ingredient for healing and regenerating the skin. From reducing scars to soothing irritation, it offers a wide range of benefits that can transform your skincare routine. Incorporating this natural remedy can help you achieve healthier, more radiant skin with consistent use. Frequently Asked Questions (FAQs) 1. Can tamanu oil be used on all skin types? Yes, tamanu oil is suitable for most skin types. However, those with oily or acne-prone skin should use it sparingly to avoid clogged pores. 2. How long does it take to see results with tamanu oil? Results vary depending on the condition being treated. For scars and dark spots, noticeable improvements may take a few weeks of consistent use. 3. Can tamanu oil be used on the scalp? Yes, tamanu oil can be applied to the scalp to soothe dryness and promote healthy hair growth. Massage it into the scalp and leave it on for 30 minutes before washing. 4. Is tamanu oil safe for children? Tamanu oil is generally safe for children but should be used in small amounts. Consult a pediatrician before applying it to sensitive or young skin. 5. Can tamanu oil help with stretch marks during pregnancy? Yes, tamanu oil’s regenerative properties make it an excellent option for preventing and reducing stretch marks. Use it regularly for the best results.

Benefits of Using Tamanu Oil for Healing and Regeneration Read More »

How to Create Metallic Eye Makeup Looks with Foil Shadows

How to Create Metallic Eye Makeup Looks with Foil Shadows

Metallic eye makeup is a showstopper, instantly adding drama and dimension to any look. Foil shadows, known for their intense pigmentation and high-shine finish, are perfect for creating dazzling metallic effects. With the right techniques, you can achieve a professional-looking metallic eye that’s ideal for special events or even a bold everyday statement. Here’s how to master metallic eye makeup with foil shadows for a captivating finish. Why Choose Foil Shadows for Metallic Eye Makeup? Foil shadows are formulated to deliver a reflective, high-shine effect that’s hard to achieve with regular eyeshadows. Their unique texture, often creamy or pressed, makes them easy to blend and layer. These shadows are versatile, allowing you to create subtle shimmer or bold metallic looks. They’re also available in a range of shades, from classic golds and silvers to vibrant jewel tones, making them suitable for any occasion. Tools You’ll Need for Metallic Eye Makeup Achieving the perfect metallic eye requires the right tools. Here’s what you’ll need: Steps to Create Metallic Eye Makeup Looks with Foil Shadows 1. Prepare Your Eyes Start with a clean, moisturized eye area. Apply an eyeshadow primer across your lids to create a smooth base and enhance the longevity of the shadow. If you want a more vibrant look, use a concealer or eyeshadow base that matches your skin tone. 2. Choose Your Metallic Shade Select a foil shadow shade that complements your skin tone and outfit. Gold and bronze shades are great for warm undertones, while silver and cool-toned hues work well for cooler skin tones. Jewel tones like emerald or sapphire add a pop of color. 3. Apply a Transition Shade Using a fluffy blending brush, apply a neutral matte shade to your crease. This step helps blend the metallic shadow seamlessly and adds depth to your look. 4. Pack the Foil Shadow Onto the Lids Take a flat synthetic brush and dampen it slightly with setting spray. Dip the brush into your foil shadow and gently press the pigment onto your lids. Avoid sweeping motions, as pressing ensures maximum color payoff and minimizes fallout. 5. Blend the Edges Use a clean blending brush to soften the edges of the foil shadow. This creates a seamless transition between the metallic shade and your transition shade, giving your look a polished finish. 6. Highlight the Inner Corners For added dimension, apply a lighter metallic shade or a highlighter to the inner corners of your eyes. This brightens your look and makes your eyes appear larger. 7. Line Your Eyes Use a liquid or gel eyeliner to define your upper lash line. For a more dramatic effect, create a winged liner. You can also apply a dark eyeshadow along the lower lash line for added intensity. 8. Finish with Mascara or Lashes Complete the look with volumizing mascara to define your lashes. If you want extra drama, add a pair of false lashes to enhance the metallic eye makeup. Pro Tips for Perfect Metallic Eye Makeup Conclusion Creating metallic eye makeup looks with foil shadows is easier than you might think. With the right tools, techniques, and a bit of practice, you can achieve dazzling, professional-quality results. Whether you’re heading to a glamorous event or simply want to elevate your everyday makeup, foil shadows are your go-to for a radiant, high-shine finish. Frequently Asked Questions (FAQs) 1. Can I use foil shadows without an eyeshadow primer? While you can use foil shadows without primer, applying a primer ensures better color payoff, prevents creasing, and makes your metallic look last longer. 2. How do I prevent fallout when using foil shadows? To prevent fallout, dampen your brush with setting spray before picking up the shadow. Press the shadow onto your lid instead of sweeping it. 3. Are foil shadows suitable for mature skin? Yes, foil shadows can work beautifully on mature skin. Opt for finer metallic textures and avoid applying too much product to prevent emphasizing fine lines. 4. Can I mix foil shadows with regular eyeshadows? Absolutely! Combining matte or shimmer shadows with foil shadows creates a balanced look and allows for more creative combinations. 5. How do I clean my brushes after using foil shadows? Foil shadows can leave residue on brushes. Use a gentle brush cleanser and lukewarm water to thoroughly clean your tools after use.

How to Create Metallic Eye Makeup Looks with Foil Shadows Read More »

Benefits of Using Hydrating Setting Sprays for Dewy Skin

Benefits of Using Hydrating Setting Sprays for Dewy Skin

A flawless, dewy complexion is the ultimate makeup goal for many. Hydrating setting sprays are the secret weapon that combines makeup longevity with skincare benefits. Designed to lock in moisture while keeping your makeup intact, these sprays are essential for achieving that healthy, lit-from-within glow. Let’s dive into the benefits of hydrating setting sprays and how they elevate your makeup routine. What Are Hydrating Setting Sprays? Hydrating setting sprays are mist-based products that serve a dual purpose: setting your makeup in place and infusing your skin with moisture. Unlike mattifying sprays that focus on oil control, hydrating formulas are packed with skin-loving ingredients like hyaluronic acid, glycerin, and botanical extracts. These sprays are lightweight, non-sticky, and designed to enhance your skin’s natural radiance. They can be used at various stages of your routine – before makeup as a prep step, after makeup to set it, or throughout the day for a refreshing boost. Benefits of Using Hydrating Setting Sprays Boosts Makeup Longevity One of the primary benefits of a hydrating setting spray is its ability to extend the wear of your makeup. The mist creates a protective layer that prevents your foundation, blush, and eyeshadow from fading or creasing. This ensures your makeup looks fresh and flawless, even in humid or dry conditions. It’s an essential step for anyone who wants their makeup to stay put from morning to night. Enhances Skin’s Natural Glow Hydrating setting sprays are formulated to deliver a radiant, dewy finish. Ingredients like glycerin and botanical extracts help reflect light, giving your skin a subtle glow. This dewy effect is perfect for those who want their makeup to look natural and luminous rather than cakey or powdery. Keeps Skin Hydrated Dry skin can make your makeup appear patchy and uneven. Hydrating setting sprays replenish moisture, ensuring your skin stays hydrated throughout the day. Hyaluronic acid, a common ingredient in these sprays, attracts and retains water, keeping your skin plump and refreshed. This is especially beneficial in harsh climates or air-conditioned environments. Reduces the Appearance of Fine Lines Dehydrated skin can make fine lines and wrinkles more noticeable. Hydrating setting sprays help smooth the skin’s surface by providing an instant moisture boost. This creates a more youthful and polished finish, making your makeup look seamless and fresh. Acts as a Mid-Day Refresh Even with the best makeup products, skin can start to look tired after a few hours. Hydrating setting sprays double as a mid-day refresher, reviving your makeup and giving your skin a quick pick-me-up. A few spritzes can instantly brighten your complexion, making you look and feel revitalized. Protects Against Environmental Stressors Many hydrating setting sprays are enriched with antioxidants like vitamin C and green tea extract. These ingredients help protect your skin from environmental stressors such as pollution and UV damage. By incorporating these sprays into your routine, you’re adding an extra layer of defense while enjoying a flawless makeup finish. How to Use Hydrating Setting Sprays Effectively Using a hydrating setting spray is simple, but the technique matters to maximize its benefits. Key Ingredients to Look For in Hydrating Setting Sprays Who Can Benefit From Hydrating Setting Sprays? Hydrating setting sprays are suitable for all skin types, but they’re particularly beneficial for: Conclusion Hydrating setting sprays are a game-changer for anyone seeking a dewy, fresh-faced look. They not only keep your makeup in place but also provide essential skincare benefits. By adding a hydrating setting spray to your routine, you can achieve a glowing, hydrated complexion that lasts all day. Frequently Asked Questions (FAQs) 1. Can I use a hydrating setting spray on bare skin? Yes, hydrating setting sprays can be used on bare skin to boost hydration and add a radiant glow. They’re great for no-makeup days. 2. Will a hydrating setting spray make my skin oily? No, most hydrating setting sprays are lightweight and designed to hydrate without leaving an oily residue. Look for oil-free formulas if you have oily skin. 3. How often should I reapply a hydrating setting spray? You can reapply a hydrating setting spray as needed throughout the day, especially if your skin feels dry or your makeup needs a refresh. 4. Are hydrating setting sprays suitable for oily skin? Yes, they can be suitable for oily skin if you choose a non-comedogenic and lightweight formula. Hydration helps balance oil production. 5. Can a hydrating setting spray replace my moisturizer? While hydrating setting sprays provide moisture, they shouldn’t replace your moisturizer. Use them as a complementary step for added hydration and a dewy finish.

Benefits of Using Hydrating Setting Sprays for Dewy Skin Read More »

Makeup Trends Inspired by Art History

Makeup Trends Inspired by Art History

Art history has always been a source of inspiration for beauty trends. From the bold hues of the Renaissance to the surrealist touches of the 20th century, makeup continues to echo the creativity of famous art movements. These trends offer a unique way to express individuality while celebrating the artistic legacy that has shaped human culture. Let’s dive into how art history has influenced contemporary makeup styles. The Renaissance: Soft and Radiant Elegance The Renaissance, known for its emphasis on natural beauty, inspires timeless and glowing makeup trends. During this period, pale skin was considered a sign of wealth and refinement. To mimic this aesthetic today, many opt for dewy foundations and soft blushes that create a radiant complexion. Renaissance-inspired makeup often includes a focus on rosy cheeks and naturally tinted lips. Think soft pinks and peaches that enhance, rather than mask, the skin’s natural beauty. This trend also emphasizes symmetry and balance, mirroring the ideals of Renaissance art. Modern makeup techniques like contouring and highlighting align well with this aesthetic. The Baroque Era: Dramatic and Ornate Looks The Baroque period brought drama and opulence to the forefront of art and beauty. This era’s influence can be seen in makeup looks that feature rich, jewel-toned eyeshadows and bold, defined eyebrows. These elements create a striking, theatrical effect. Baroque-inspired makeup often includes intricate details, such as metallic accents on the eyelids or dramatic winged eyeliner. These touches reflect the grandeur of Baroque art and architecture. Lips in deep reds or burgundies complete the look, adding a sense of sophistication and mystery. Rococo: Soft Pastels and Playful Charm Rococo art is characterized by its pastel palette and whimsical style, which translate beautifully into makeup trends. Rococo-inspired looks feature soft, powdery colors like baby blue, lavender, and blush pink. These hues can be used for eyeshadows, blushes, or even pastel eyeliner for a playful twist. Subtle shimmer is another hallmark of Rococo makeup. Highlighters with a soft, pearlescent finish add a touch of elegance without overpowering the look. Lips are kept light and glossy, often in shades of peach or nude, to maintain a youthful and fresh appearance. Surrealism: Bold and Avant-Garde Statements The Surrealist art movement embraced the unconventional, inspiring daring and imaginative makeup trends. Surrealist-inspired looks often include asymmetrical designs or unexpected pops of color. For example, one eye might feature a bold graphic liner while the other remains understated. This trend also explores unique textures and shapes. Glitter, rhinestones, or abstract designs drawn onto the face can create a surreal, dreamlike effect. The key to Surrealist makeup is breaking the rules and letting creativity take center stage. This approach allows for truly personalized and artistic expressions. Pop Art: Vivid Colors and Graphic Details Pop Art, with its bold and graphic style, remains a popular influence in makeup. This trend features bright, saturated colors like neon pinks, yellows, and blues. These vibrant shades can be applied to the eyelids, cheeks, or lips for a statement-making look. Graphic eyeliner designs, such as double wings or geometric shapes, also echo the Pop Art aesthetic. These details create a fun and modern twist on classic makeup styles. Lips outlined in contrasting colors or filled with unusual patterns, like polka dots, are another nod to the playful nature of Pop Art. How to Incorporate Art History into Your Makeup Routine Incorporating art-inspired trends doesn’t mean you have to replicate historical looks exactly. Here’s how to make them wearable for everyday life: Conclusion Makeup trends inspired by art history offer a creative way to celebrate the beauty of the past while expressing individuality. From the soft elegance of the Renaissance to the bold statements of Surrealism, these trends bring artistry to everyday life. Whether you prefer subtle nods to history or avant-garde expressions, art-inspired makeup allows you to create looks that are as timeless as they are unique. Frequently Asked Questions (FAQs) 1. Can art-inspired makeup trends be worn daily? Yes, many art-inspired trends can be adapted for everyday wear. For example, soft Renaissance blushes or Rococo pastels are subtle enough for casual looks. 2. What are the best products for achieving Renaissance-inspired makeup? Look for dewy foundations, soft blushes, and tinted lip balms in natural tones. Highlighters can also add a radiant touch. 3. How do I create a Surrealist makeup look? Experiment with asymmetrical designs, bold colors, and unique textures like glitter or rhinestones. Focus on creativity and breaking traditional rules. 4. Which art movement is best for bold makeup lovers? Pop Art and Baroque trends are perfect for bold makeup enthusiasts. They feature vibrant colors, dramatic details, and graphic elements. 5. Can I mix different art-inspired trends in one look? Absolutely! Mixing trends, like combining Rococo pastels with a Pop Art-inspired bold lip, allows you to create a unique and personalized makeup style.

Makeup Trends Inspired by Art History Read More »

Art of Hair Texturizing: What You Need to Know

Art of Hair Texturizing: What You Need to Know

Hair texturizing is a game-changer for anyone seeking more movement, volume, or definition in their hairstyle. This technique involves using specialized tools and methods to remove bulk, add dimension, or enhance natural texture. Whether you have fine, thick, or wavy hair, texturizing can elevate your look without compromising length. Let’s explore what makes hair texturizing an essential part of modern hairstyling. What is Hair Texturizing? Hair texturizing is a hairstyling technique designed to modify the shape and flow of your hair. Unlike traditional cutting, texturizing focuses on strategically thinning or shaping sections of the hair to create a lighter, more natural look. It can be performed using various tools, including texturizing shears, razors, or regular scissors with advanced techniques. The goal is to personalize your hairstyle, ensuring it complements your hair type, face shape, and personal style. Benefits of Hair Texturizing Texturizing offers more than just aesthetic appeal. It’s a versatile technique that solves common hair challenges while enhancing your overall look. 1. Adds Volume and Movement Texturizing removes bulk from heavier areas of your hair, allowing for more lift and natural movement. This is especially beneficial for thick hair that tends to fall flat without layers. 2. Enhances Styling Versatility Texturized hair is easier to style because it’s lighter and more manageable. Whether you’re creating curls or a sleek updo, texturizing ensures your hair holds the style better. 3. Reduces Bulk and Weight For those with thick hair, texturizing can create a more balanced look. It removes unnecessary weight, making your hair feel and look less dense. 4. Adds Dimension to Fine Hair Fine hair often lacks the volume and depth needed for dynamic hairstyles. Texturizing creates the illusion of fullness by adding layers and definition. Popular Hair Texturizing Techniques Several texturizing methods are tailored to different hair types and desired outcomes. Here are some of the most common techniques: Point Cutting Point cutting involves snipping into the hair at an angle to soften the ends. This technique adds texture and movement without drastically changing the length. Razor Cutting A razor is used to create soft, feathered layers. This technique works well for medium to long hair and is ideal for achieving a natural, lived-in look. Image suggestion: A stylist using a razor to create soft layers on medium-length hair. Slide Cutting Slide cutting involves gliding scissors down a section of hair to thin it out and add texture. It’s perfect for blending layers seamlessly. Thinning Shears Thinning shears are used to remove bulk from thick hair. This tool helps create a more balanced and manageable style. Dry Cutting Dry cutting allows stylists to see how the hair naturally falls, ensuring precise texturizing. It’s ideal for creating movement and volume in curly or wavy hair. Is Hair Texturizing Right for You? Texturizing can benefit almost every hair type, but it’s essential to understand how it works for your specific needs: Image suggestion: Before and after images of texturized hair, showing increased volume and dimension. How to Maintain Texturized Hair Proper care ensures your texturized hair remains vibrant and easy to style: Image suggestion: A variety of haircare products for texturized hair, including a lightweight mousse and a heat protectant spray. Common Mistakes to Avoid While texturizing is highly beneficial, mistakes can impact the outcome: Conclusion The art of hair texturizing is all about enhancing your natural beauty while addressing specific hair concerns. From adding volume and movement to reducing bulk, this technique offers something for everyone. Whether you’re considering a fresh haircut or a subtle update, texturizing can take your hairstyle to the next level. Frequently Asked Questions (FAQs) 1. How often should I get my hair texturized? It depends on your hair type and growth rate. Generally, every 6-8 weeks is ideal to maintain the texture and shape. 2. Can I texturize my hair at home? While it’s possible with the right tools, professional stylists are trained to achieve precise results without damaging your hair. 3. Does hair texturizing work for all hair lengths? Yes, texturizing can be done on short, medium, and long hair. The technique is adjusted to suit the length and desired look. 4. Will texturizing make my hair thinner? Texturizing removes bulk but doesn’t make the overall hair appear thinner. It’s designed to create balance and movement. 5. Can texturizing help with frizz? Yes, when done correctly, texturizing can reduce frizz by removing bulk and shaping the hair for a smoother appearance.

Art of Hair Texturizing: What You Need to Know Read More »

How to Create DIY Hair Perfume Roll-Ons

How to Create DIY Hair Perfume Roll-Ons

DIY hair perfume roll-ons are a great way to enjoy personalized scents while caring for your hair. Unlike store-bought hair perfumes, these roll-ons are free of harsh chemicals and tailored to your preferences. With just a few simple ingredients, you can create a long-lasting fragrance that keeps your hair smelling amazing and nourished. Why Make Your Own Hair Perfume Roll-Ons? Creating your own hair perfume roll-ons offers numerous benefits. First, you can avoid synthetic ingredients found in commercial products. Second, it allows you to customize the scent and strength to suit your preferences. Lastly, DIY roll-ons are cost-effective and easy to make. Essential Ingredients for Hair Perfume Roll-Ons To make a hair perfume roll-on, you’ll need a few basic ingredients: 1. Carrier Oil A lightweight carrier oil like jojoba or fractionated coconut oil is essential. These oils moisturize your hair without weighing it down. 2. Essential Oils Essential oils provide the fragrance. Choose oils like lavender, jasmine, or rosemary for their delightful scents and hair benefits. 3. Alcohol or Witch Hazel (Optional) Adding a small amount of alcohol or witch hazel helps the scent last longer. 4. Roll-On Bottle A glass roll-on bottle makes application easy and mess-free. Step-by-Step Guide to Making DIY Hair Perfume Roll-Ons Follow these simple steps to create your own hair perfume roll-on: Step 1: Gather Your Materials Prepare your carrier oil, essential oils, and roll-on bottle. Ensure all tools and bottles are clean and dry. Step 2: Choose Your Essential Oils Pick 2-3 essential oils to create your desired scent. For example, mix lavender and bergamot for a calming aroma, or try jasmine and orange for an uplifting fragrance. Step 3: Add Carrier Oil to the Bottle Fill your roll-on bottle about 3/4 full with your chosen carrier oil. Leave enough space for the essential oils and optional alcohol or witch hazel. Step 4: Add Essential Oils Add 10-15 drops of essential oils to the bottle. Adjust the amount based on your scent preference. Step 5: Add Alcohol or Witch Hazel (Optional) For a longer-lasting fragrance, add a small splash of alcohol or witch hazel to the mixture. Shake well to combine. Step 6: Secure the Roller Ball Attach the roller ball to the bottle securely. Give the bottle a gentle shake to mix the ingredients thoroughly. Step 7: Test and Adjust Roll a small amount onto your wrist or hair to test the scent. Adjust the essential oil ratio if needed. Tips for Using DIY Hair Perfume Roll-Ons Best Essential Oils for Hair Perfume Roll-Ons Here are some essential oils to consider: Conclusion Creating DIY hair perfume roll-ons is a fun and rewarding way to enjoy personalized scents while nourishing your hair. With just a few natural ingredients, you can make a chemical-free, long-lasting fragrance that’s perfect for any occasion. Try experimenting with different essential oils to find your signature scent! Frequently Asked Questions (FAQs) 1. How long does a DIY hair perfume roll-on last? A well-made hair perfume roll-on can last up to 6 months if stored properly in a cool, dark place. 2. Can I use regular perfume on my hair instead? Regular perfume often contains alcohol, which can dry out your hair. DIY roll-ons are a safer, nourishing alternative. 3. How do I prevent my hair from feeling greasy? Use a lightweight carrier oil like jojoba and apply the roll-on sparingly to avoid greasiness. 4. Are there any essential oils to avoid? Avoid using phototoxic oils like bergamot or citrus oils if you’ll be exposed to sunlight, as they can cause irritation. 5. Can I use these roll-ons on my skin? Yes, hair perfume roll-ons are safe for the skin. However, always do a patch test to ensure you don’t have an allergic reaction.

How to Create DIY Hair Perfume Roll-Ons Read More »

Benefits of Using Electric Toothbrushes with Whitening Modes

5 Benefits of Using Electric Toothbrushes with Whitening Modes

Electric toothbrushes with whitening modes have revolutionized oral care. These advanced devices combine effective cleaning technology with stain-removal features, offering a brighter smile and healthier teeth. Unlike traditional toothbrushes, they are designed to target discoloration and remove surface stains while maintaining optimal oral hygiene. Let’s explore their benefits and why they’re a game-changer in oral care. What Are Electric Toothbrushes with Whitening Modes? Electric toothbrushes with whitening modes are specially designed to clean teeth thoroughly and enhance their appearance. They typically feature settings that focus on polishing the surface of teeth and removing stains caused by coffee, tea, wine, and other foods. The whitening mode uses specific vibrations and brushing motions to break down stains more effectively than manual brushing. Paired with a quality whitening toothpaste, these toothbrushes can significantly improve the brightness of your smile over time. Benefits of Electric Toothbrushes with Whitening Modes 1. Superior Plaque Removal Electric toothbrushes are proven to remove plaque more effectively than manual brushes. The whitening mode enhances this by focusing on areas prone to staining and discoloration. This ensures cleaner teeth and reduces the risk of cavities and gum disease. 2. Removes Surface Stains The specialized whitening modes use oscillating or sonic technology to polish teeth and lift surface stains. This can help reverse discoloration caused by common culprits like coffee, tobacco, and sugary drinks. 3. Improves Gum Health Electric toothbrushes are gentle on gums while providing a deep clean. Many models include pressure sensors to prevent over-brushing, which can damage gums. Healthy gums are essential for maintaining overall oral health and achieving a brighter smile. 4. Promotes Consistency in Oral Hygiene The built-in timers in electric toothbrushes encourage consistent brushing for the dentist-recommended two minutes. Whitening modes further ensure that each tooth receives equal attention, enhancing both hygiene and appearance. 5. Saves Time and Effort With electric toothbrushes, you don’t need to apply as much manual effort. The brush does the work for you, making it easier to maintain a consistent and effective oral care routine. Whitening modes streamline the process, delivering noticeable results in less time. How Whitening Modes Work Electric toothbrushes with whitening modes use advanced technology to target stains. Here’s how they work: Combined with a whitening toothpaste, these features make electric toothbrushes highly effective at improving the appearance of teeth. Key Features to Look For When choosing an electric toothbrush with a whitening mode, consider the following features: Tips for Maximizing Results Are Electric Toothbrushes with Whitening Modes Safe? Yes, they are safe for daily use. Most models are designed to be gentle on teeth and gums while effectively removing stains. However, individuals with sensitive teeth or gum conditions should choose a toothbrush with adjustable intensity settings. If you’re unsure about using an electric toothbrush with whitening mode, consult your dentist. They can recommend the best option for your oral health needs. Conclusion Electric toothbrushes with whitening modes are an excellent investment for anyone looking to enhance their oral hygiene and achieve a brighter smile. They combine advanced cleaning technology with stain-removal features, offering superior results compared to manual brushing. With proper use, these toothbrushes can transform your oral care routine and leave you with healthier, whiter teeth. Frequently Asked Questions (FAQs) 1. How often should I use the whitening mode? You can use the whitening mode daily, but it’s essential to follow the manufacturer’s recommendations. For sensitive teeth, limit usage to a few times a week. 2. Can an electric toothbrush whiten teeth permanently? Electric toothbrushes with whitening modes remove surface stains but do not change the natural color of your teeth. Regular use helps maintain a brighter smile. 3. Are electric toothbrushes with whitening modes safe for sensitive teeth? Yes, many models offer adjustable intensity settings, making them suitable for sensitive teeth. Choose a toothbrush designed for sensitivity for the best results. 4. Do I need special toothpaste for whitening modes? While you can use regular toothpaste, pairing the toothbrush with a whitening toothpaste enhances stain removal and improves results. 5. How long does it take to see results? You may notice an improvement in a few weeks with consistent use. Results vary depending on the extent of staining and your oral care routine.

5 Benefits of Using Electric Toothbrushes with Whitening Modes Read More »