Maintaining clean makeup brushes is an essential aspect of any beauty routine. Yet, many overlook the importance of regular brush cleaning, unaware of the accumulated bacteria, dirt, and oils that lurk within the bristles.
In this article, we will delve into the most efficient and natural method to clean your makeup brush, providing you with a step-by-step guide and tips for maintaining pristine brushes.
Preparing for Cleaning
To start cleaning your makeup brushes naturally, gather the necessary supplies. You’ll need a gentle soap or shampoo that won’t damage the bristles, a clean towel or paper towels for drying, and lukewarm water. Creating a suitable workspace is equally important. Clear an area specifically dedicated to brush cleaning and set up a drying area where your brushes can air dry without any obstructions.
Step-by-Step Guide: Natural Makeup Brush Cleaning
Step 1: Preparing the Brushes
Before cleaning your brushes, take a moment to examine their condition. Identify the brush materials to determine the best cleaning approach. Also, check for any loose ferrules or bristles that may need repair before cleaning to prevent further damage.
Step 2: Rinsing the Brushes
Start by wetting the bristles under lukewarm water. Be careful not to submerge the brush entirely, as this can loosen the glue that holds the bristles together. Ensure the water doesn’t come into contact with the ferrules or handles, as it can cause damage or loosening of the adhesive.
Step 3: Cleansing the Brushes
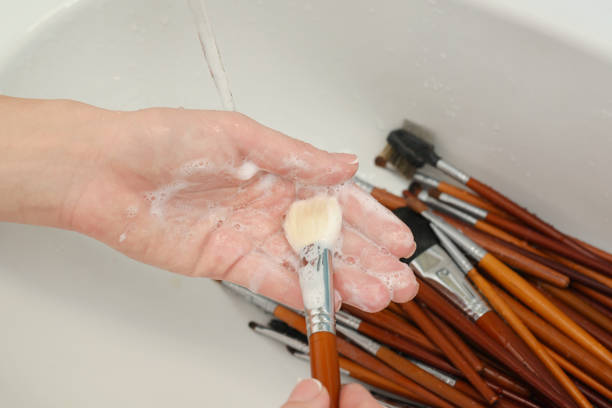
Choose a suitable soap or shampoo for cleaning your brushes. Look for a gentle, sulfate-free option that won’t strip away natural oils from the bristles. Dispense a small amount of soap or shampoo onto the palm of your hand and gently swirl the brush in the soap to create a lather.
Step 4: Washing the Brushes
Massage the bristles in circular motions on your palm, working the soap deep into the bristles. Pay particular attention to the bristle tips and densely packed areas. This step helps to dislodge any stubborn makeup residue or oils trapped within the brush.
Step 5: Rinsing off the Soap
Hold the brush under running water, ensuring the water flows in the same direction as the bristles. Continue rinsing until the water runs clear and no soap residue remains. Take care not to get water on the ferrules or handles, as this can weaken the glue or cause damage over time.
Step 6: Removing Excess Water
After rinsing, gently squeeze the bristles with your fingertips to remove excess water. Avoid applying excessive pressure or twisting motions, as this can misshape or damage the bristles. Repeat this step until no more water is being released.
Drying and Shaping the Brushes
Step 1: Towel Drying
Place a clean towel or paper towel on a flat surface. Roll each brush gently between your hands over the towel to absorb excess water. Be cautious not to rub the bristles vigorously, as this can cause fraying or breakage.
Step 2: Reshaping the Bristles
Using your fingers, gently reshape the bristles to their original form. Ensure that all bristles are aligned and free from tangles or clumps. This step is crucial for maintaining the shape and effectiveness of your brushes.
Step 3: Air Drying the Brushes
Lay the brushes flat on a clean towel or hang them with the bristles facing down. Avoid drying them upright, as water can accumulate in the ferrules, causing damage. It’s important to place the brushes in a well-ventilated area away from direct heat or sunlight, as excessive heat can weaken the glue and lead to bristle shedding.
Maintaining Clean Brushes
A. Regular Cleaning Frequency
Establishing a regular cleaning schedule is essential for maintaining clean brushes. Different brush types require varying frequencies of cleaning. Foundation brushes, for instance, should be cleaned after every use, while eyeshadow brushes can be cleaned weekly. Adjust the cleaning frequency based on your personal usage and hygiene preferences.
B. Spot Cleaning between Deep Cleans
In addition to regular deep cleaning, spot cleaning your brushes is beneficial for immediate reuse. Using a brush cleaner or an alcohol-based spray, you can quickly sanitize your brushes between applications. Simply spritz the cleaner onto a tissue or cloth and swirl the brush bristles in the solution, ensuring they’re thoroughly cleaned.
C. Proper Storage of Clean Brushes
Once your brushes are clean and dry, store them appropriately to maintain their cleanliness. Keep brushes in a clean, dry, and well-ventilated area, away from direct sunlight or humid conditions. Utilize brush guards or protective covers to prevent dust accumulation and preserve the shape of the bristles.
Conclusion
Clean makeup brushes are essential for flawless application and healthy skin. By adopting natural cleaning methods, you can effectively remove impurities while safeguarding the longevity of your brushes. Remember to follow the step-by-step guide provided, maintaining a regular cleaning schedule and incorporating spot cleaning to keep your brushes in optimal condition. By making these small adjustments, you can ensure your makeup routine remains as fresh as your brushes.
FAQ
1. How often should I clean my makeup brushes?
Cleaning frequency depends on the type of brush. Foundation brushes should be cleaned after each use, while eyeshadow brushes can be cleaned weekly. Adjust based on personal usage.
2. Can I use regular soap to clean my brushes?
It’s best to use a gentle soap or shampoo specifically designed for brushes. Regular soap may be too harsh and strip natural oils from the bristles.
3. Are natural cleaning methods effective in removing stubborn makeup?
Yes, natural cleaning methods can effectively remove stubborn makeup if done properly. It may require more time and effort, but they are efficient.
4. What can happen if I don’t clean my makeup brushes regularly?
Using dirty brushes can lead to clogged pores, breakouts, and even infections. Bacteria and product buildup can transfer to your skin during makeup application.
5. Can I use a hairdryer to speed up the drying process?
It’s best to avoid using a hairdryer as the heat can damage the bristles. Air drying is the safest method to preserve the integrity of the brushes.
6. How do I know if my brushes are damaged and need replacement?
Signs of damaged brushes include shedding bristles, misshapen bristles, or loose ferrules. If your brushes no longer function properly, it may be time to replace them.
7. Can I use the same cleaning method for all types of makeup brushes?
Different brush materials may require specific cleaning methods. Adjust your cleaning technique based on the brush’s material to avoid damaging it.
8. Is it necessary to invest in expensive brush cleaners?
Expensive brush cleaners are not necessary. You can achieve effective cleaning using gentle soap or shampoo, making natural cleaning methods a cost-effective option.
9. What are the benefits of natural cleaning methods?
Natural cleaning methods avoid harsh chemicals that can damage bristles and cause skin reactions. They also contribute to a more eco-friendly approach to beauty.
10. How should I store my brushes to maintain their cleanliness?
Store brushes in a clean, dry, and well-ventilated area. Utilize brush guards or protective covers to prevent dust accumulation and maintain the shape of the bristles.


